

How to create a digital signature in OpenOffice
Apache OpenOffice is open-source word processing software, which differs from Microsoft Word and Excel in that it’s available to general users and developers for free.
If you’re using it for important documents, you’ll want to get them eSigned securely. So, let’s find out how to create a digital signature in OpenOffice.
How can I add a digital signature in OpenOffice / LibreOffice?
In OpenOffice (or its successor, LibreOffice), you can sign ODF documents created within the suite, plus PDF documents created elsewhere.
Before you sign documents, you’ll need adigital certificate to prove their authenticity. Here’s how to use OpenOffice to insert electronic signatures:
Getting a certificate
Various security providers offer free digital certificates, including Trustcenter, Comodo, StartSSL, and CAcert. Certificates are typically valid for one year and then require renewal.
You can also pay to have your personal data validated by a company like Globalsign or Verisign.
To make a certificate usable for OpenOffice there are some prerequisites.
OpenOffice.org supports the internal certificate store for some systems, and the Network Security Service of Mozilla (usually installed as part of Firefox and Thunderbird packages).
- On Windows, using Mozilla or Firefox, you have to export your certificate into a file from the Mozilla Certificate store and import it into the Microsoft keystore.
- On Linux or Solaris, you need a certificate obtained from a Certificate Authority.
Signing ODF documents
ODF (Open Document Format) is the default file format for LibreOffice documents. To add a digital signature to OpenOffice docs:
- Open File > Digital Signatures and click Digital Signatures.
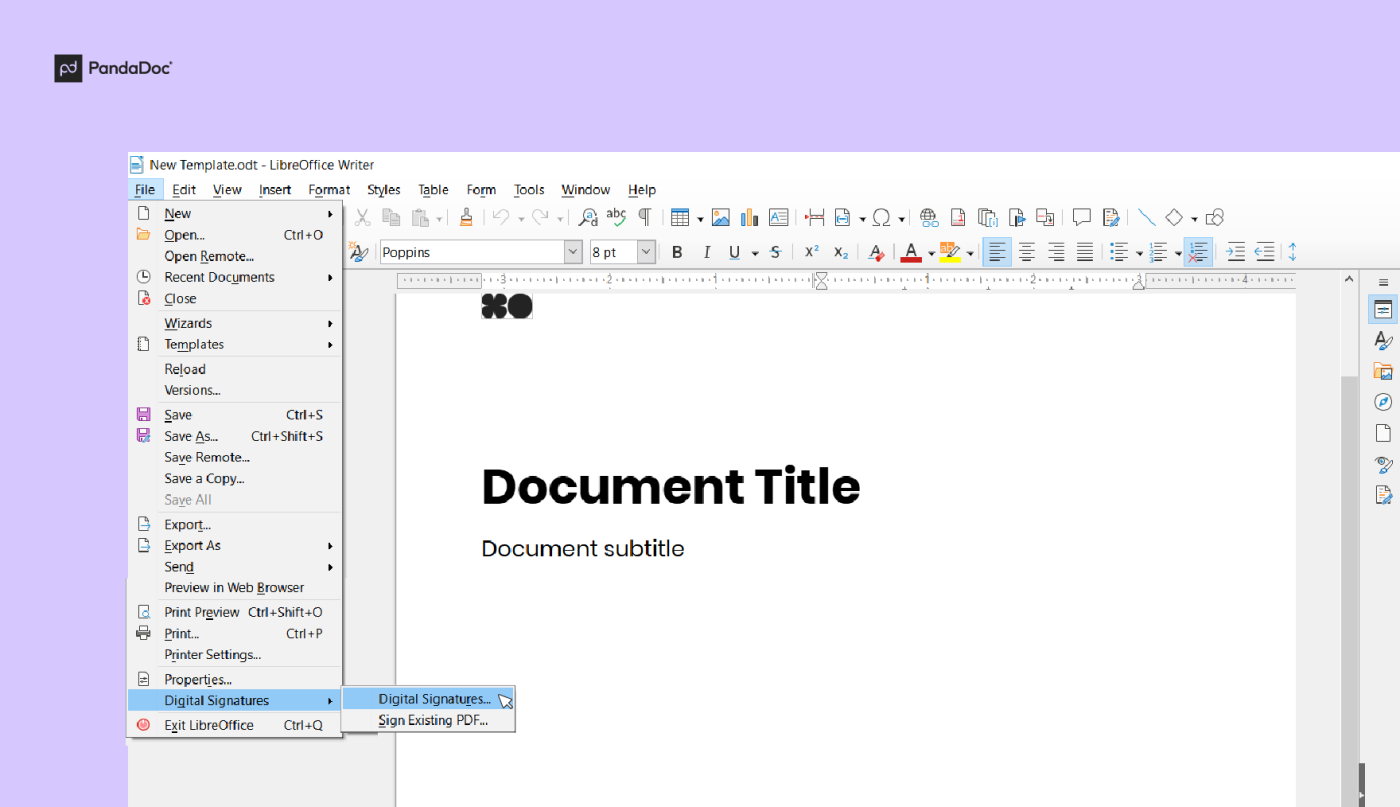
2. OpenOffice will alert you that documents must be saved before signing. Click Yes when prompted and save the document.
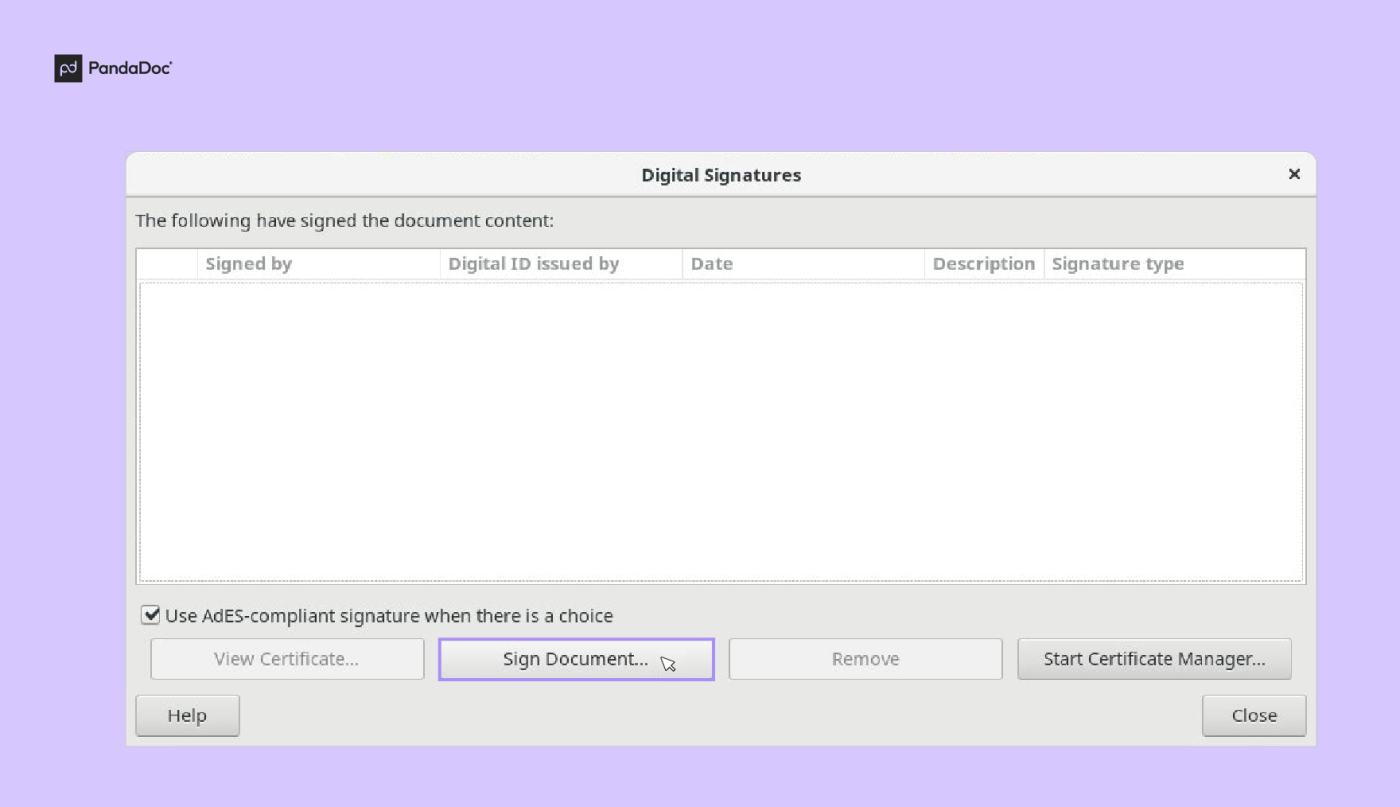
3. In the Digital Signatures dialog box, click Sign Document.
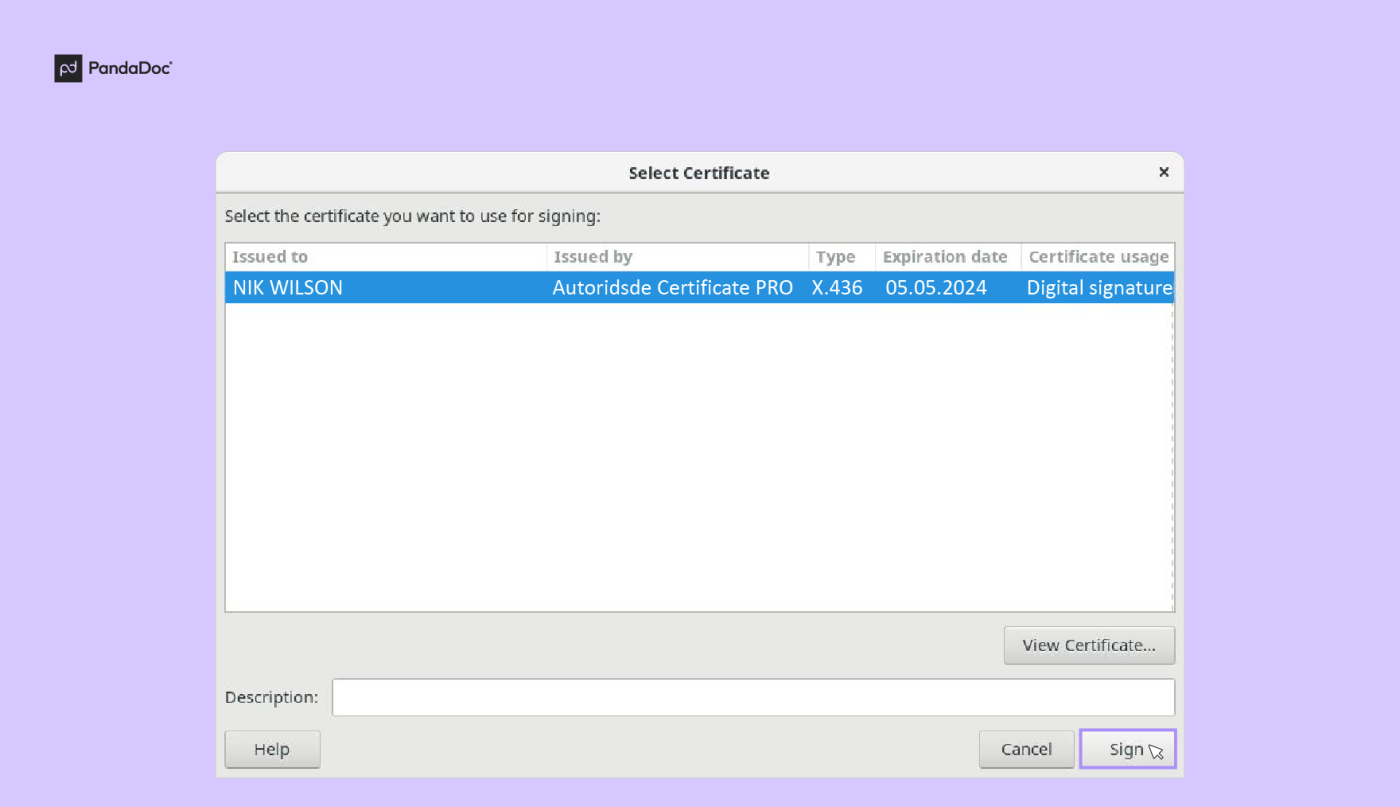
4. When asked for your token’s PIN password, type it and click OK.
5. In the Select Certificate dialog box, choose the certificate to be used and click Sign.
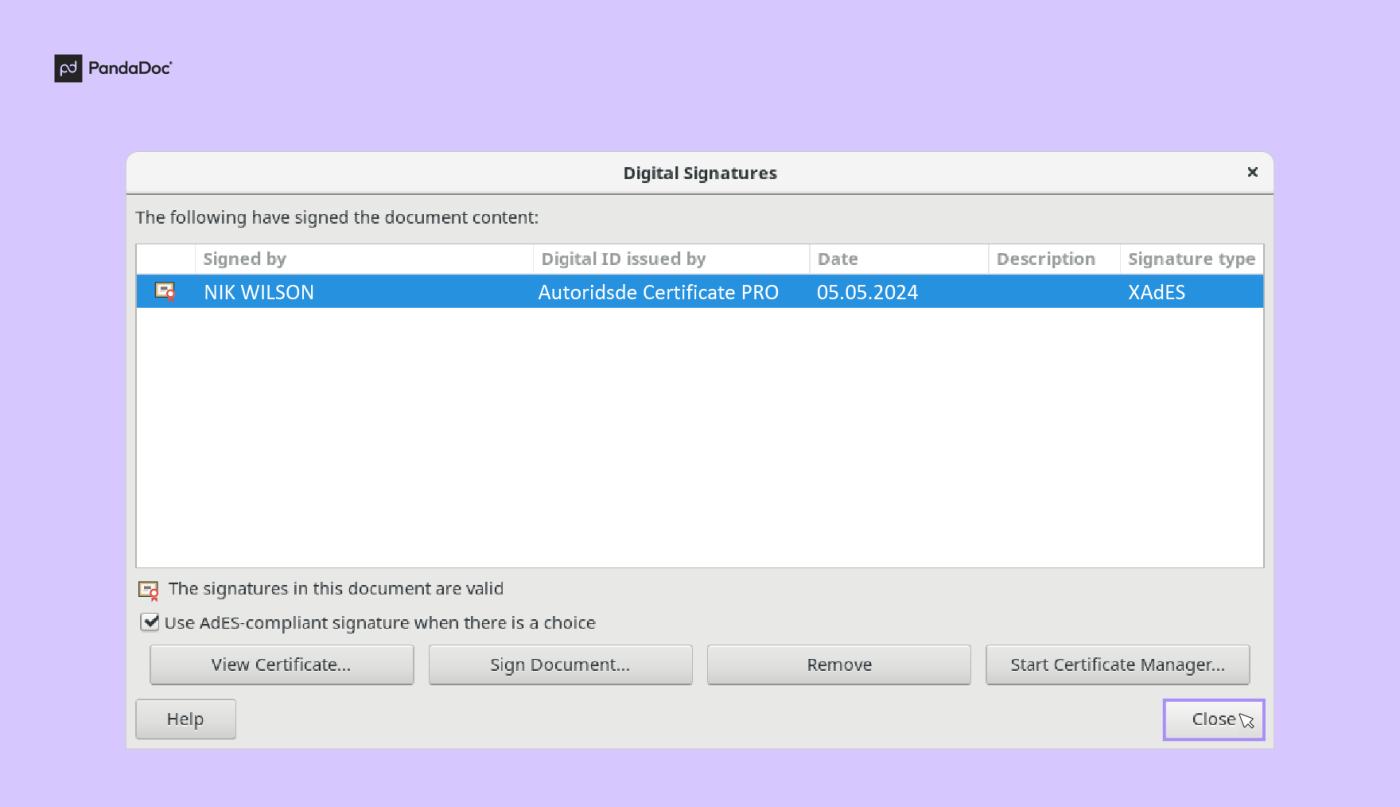
6. The digital signature will be shown in the Digital Signatures dialog.
7. Click Close.
When you open a signed ODF document, OpenOffice alerts you that it’s been signed.
To view the digital signature, double-click the Digital Signature icon on the status bar, or click the Show Signatures button on the alert. There’s a timestamp showing when the doc was signed.
Exporting an ODF document as a signed PDF
You can also export an ODF document as a signed PDF. The ODF does not need to be signed already, as you can add the OpenOffice signature along the way:
- Go to File >Export As and click Export as PDF.
- Switch to the Digital Signatures tab.
- Under Certificate, click Select.
- In the Select Certificate dialog box, choose the certificate to be used and click Sign.
- Click Export and save the PDF file.
To check the document and signature, open the PDF with LibreOffice Draw. As with ODFs, it notifies you that the document is signed, via the Digital Signature icon or the Show Signatures button.
Signing PDF documents
Here’s how to create digital signatures for PDF documents created in the OpenOffice suite or a different application:
- Go to File >Digital Signatures and click Sign Existing PDF.
- Open the PDF document that you want to sign (LibreOffice Draw opens it in read-only mode).
- Click Sign Document and the Digital Signatures dialog box will appear.
- Add the OpenOffice digital signature using the same steps as signing an ODF document (as described above).
Using Chromium certificates
If you’re a Chromium user, there’s no need to install and set up Firefox to sign documents with OpenOffice. Instead, set up OpenOffice to use the Chromium public key infrastructure:
- Open Tools >Options.
- On the left-hand menu tree, expand LibreOffice and select Security.
- On the right, under Certificate Path, click the Certificate button.
- In the Certificate Path dialog box, click Add.
- In the Select Path dialog box, press Ctrl + L to manually enter the location. Chromium stores its certificate configuration in ~/.pki/nssdb/ so type this and click OK.
- Click OK to close the Certificate Path dialog box.
- Click OK to close the Options dialog box.
- Restart OpenOffice.
Viewing certificate details
If you want to see the details of the certificate for an OpenOffice file:
- Open File >View Signatures.
- From the drop-down menu, select Signature Details.
- This will display all the available certificates, with information such as validity period, certificate authority and root, and the signer.
- When you see the message “This certificate is validated”, it shows that OpenOffice was able to establish the Certification Path to the certificate of a known certification authority.
Secure OpenOffice documents with a digital signature
Adding certified digital signatures to your important documents is good practice for businesses, as it proves authenticity and security.
Now we know how to create a digital signature in OpenOffice, whether it’s an ODF or PDF document.
Don’t forget that you can also upload PDFs (and other document types) to PandaDoc in order to send and store them securely, as well as creating your own documents from templates and having them signed electronically.