How to fill out an invoice
An invoice is a document created to request payment for a product or service that has been sold.
It must be filled out properly to avoid any mistakes and, most important, ensure you get paid! Here’s how to do it right.
Below, we’ll go through a step-by-step guide on filling out an invoice.
To begin, the following information should always be included:
- Business name and contact details
- The client’s contact information
- A unique invoice number
- A summary of the services or products provided
- Payment terms
- The invoice due date
- The total amount owing on the invoice
Step 1. Fill out business contact information
The header of the document should contain the word “invoice” and your business contract details.
These include:
- Business name (or just your name if you are a freelancer)
- Logo (optional)
- Business address
- Phone number
- Email address
Branding your invoice and including the business name are essential to avoid getting lost among other invoices, helping recipients know exactly who the invoice is from.
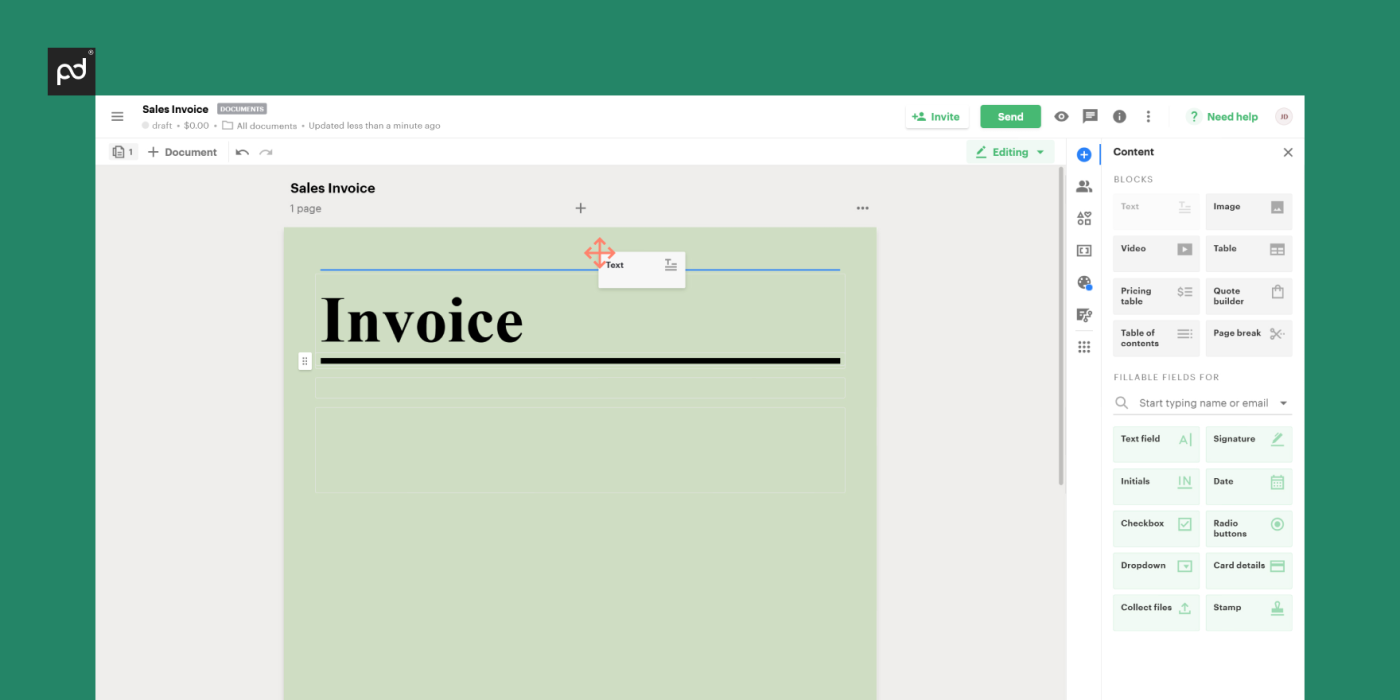
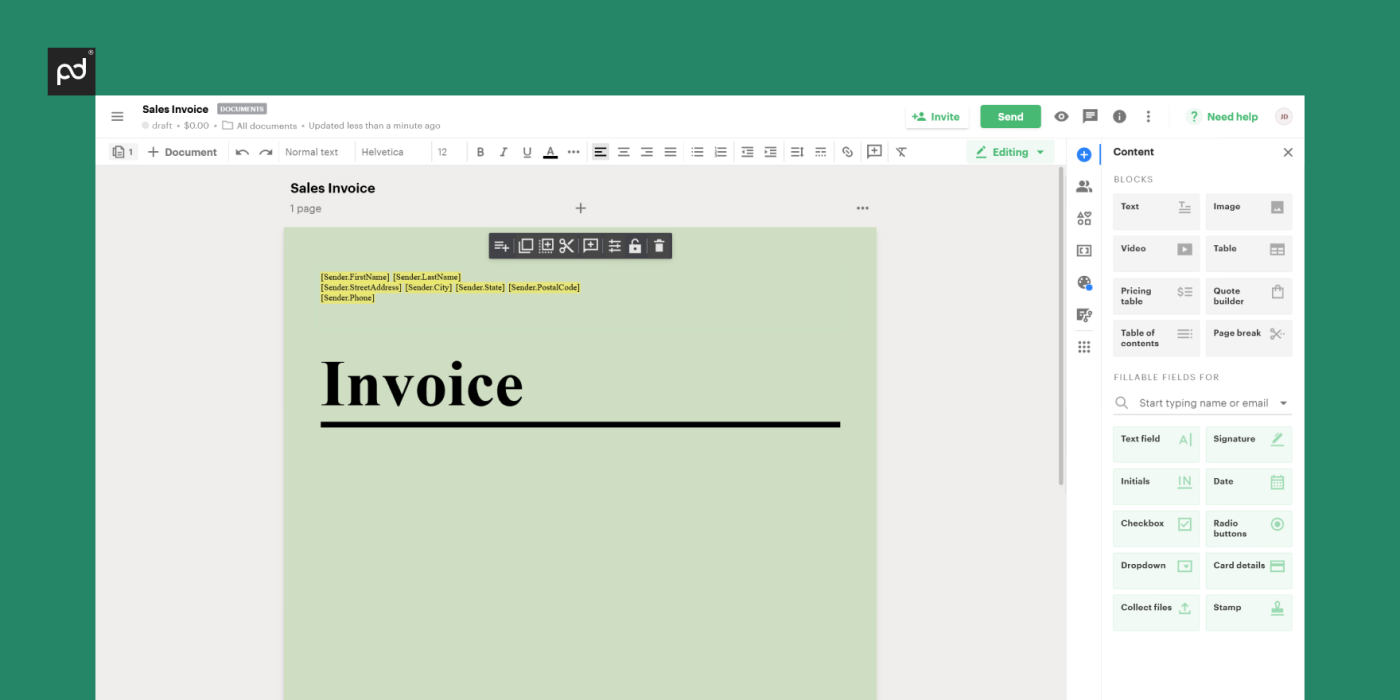
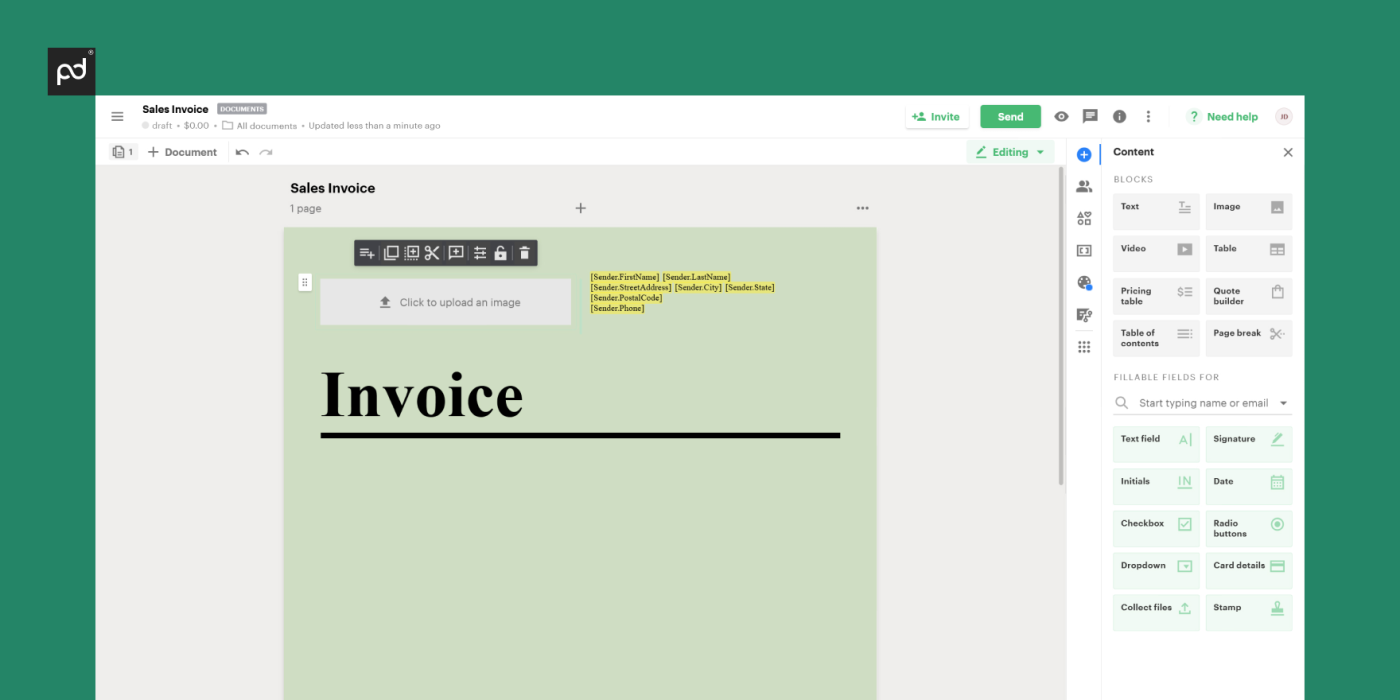
This is how you can include your contact details using PandaDoc:
1. Add a text block to the invoice template
2. Fill out your contact information
3. Upload your company’s logo
Step 2. Fill out the client’s contact details
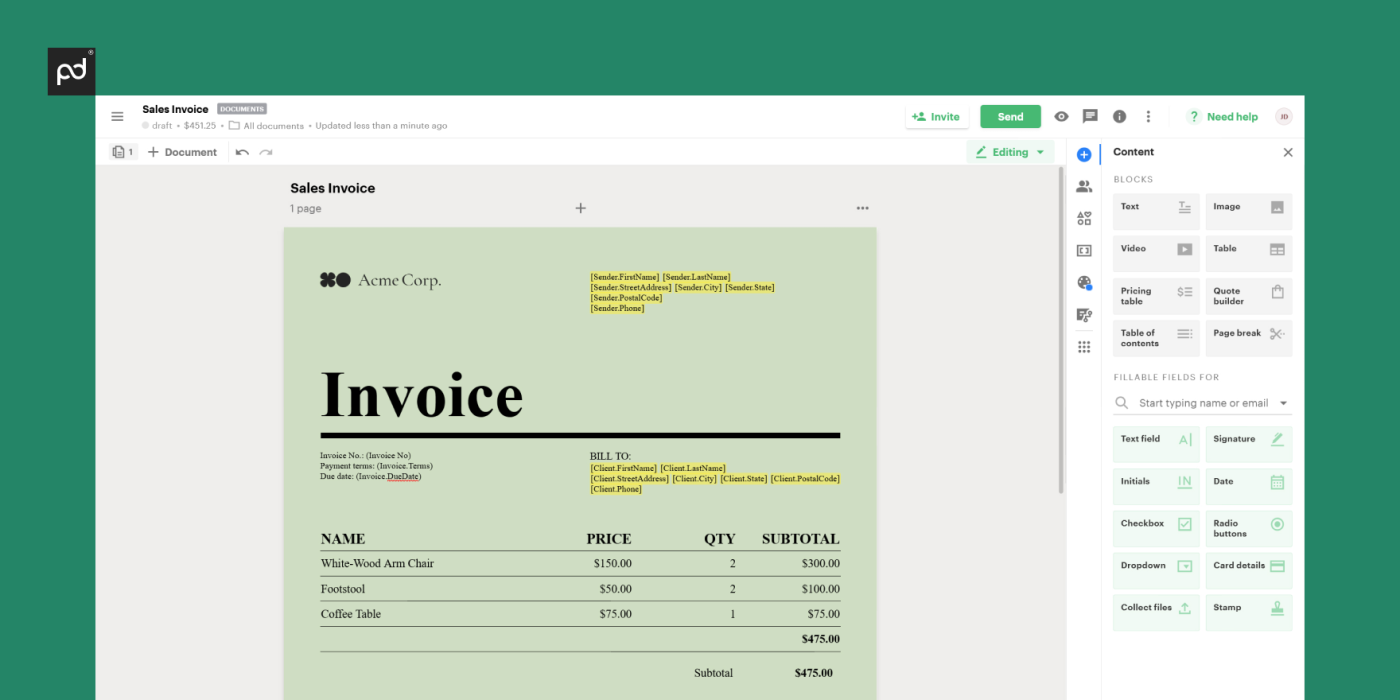
Once you enter your business info, fill out the client’s contact information directly below.
The following information should be listed:
- Customer’s business name
- Their shipping and billing addresses
- Email and phone number (optional)
PandaDoc can be integrated with your CRM, so you can automatically pull all the needed information for this and any further steps of filling out the invoice.
Here is how it might look like using PandaDoc:
Step 3. Generate a unique invoice number
An invoice number (also known as invoice ID or reference number) refers to a unique number you assign to each invoice.
This number acts as an identifier for your invoices, helping you avoid possible accounting errors like payment duplications.
There are several ways you can generate an invoice number:
- Sequential
- Chronological
- By customer number
- Based on the project number
The most popular option, though, is sequential, where the number increases by one with every new invoice (if your previous invoice is recorded as 001, the next one will be 002).
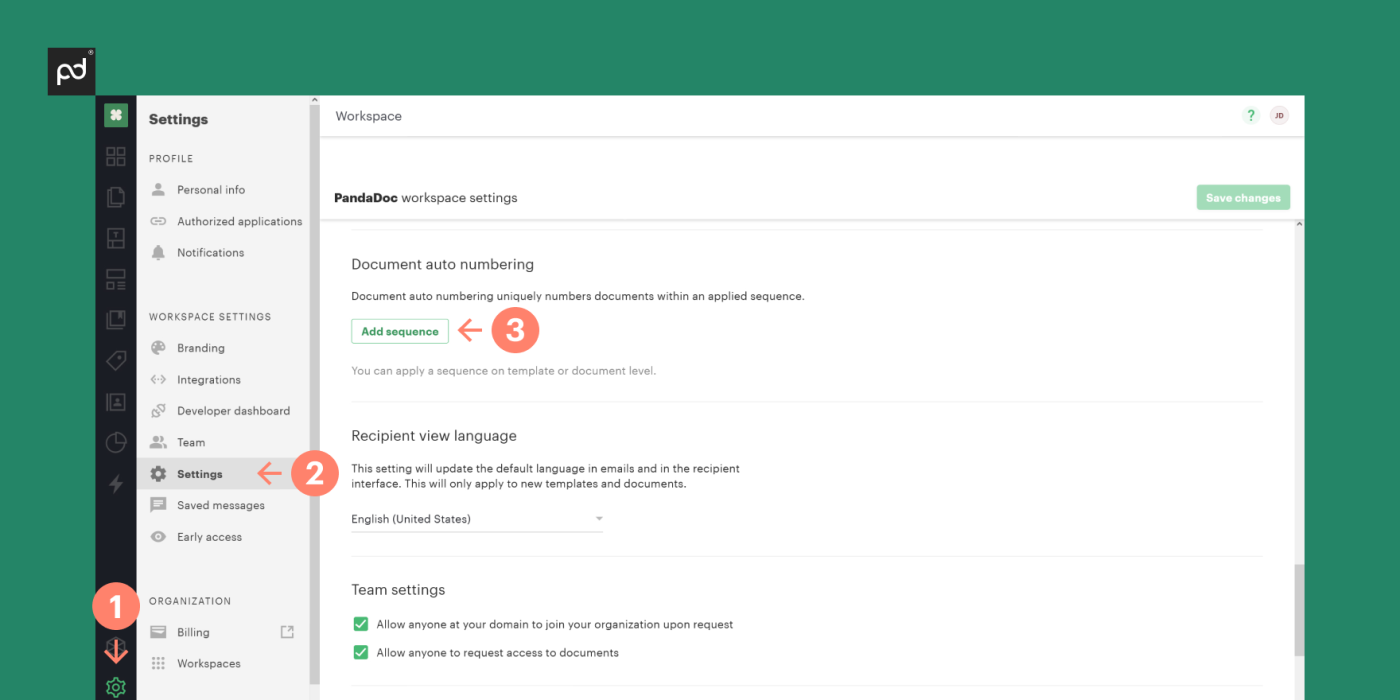
Here is how you can auto number invoices with PandaDoc:
1. Choose your name in the lower-left corner and then choose “Workspace defaults.”
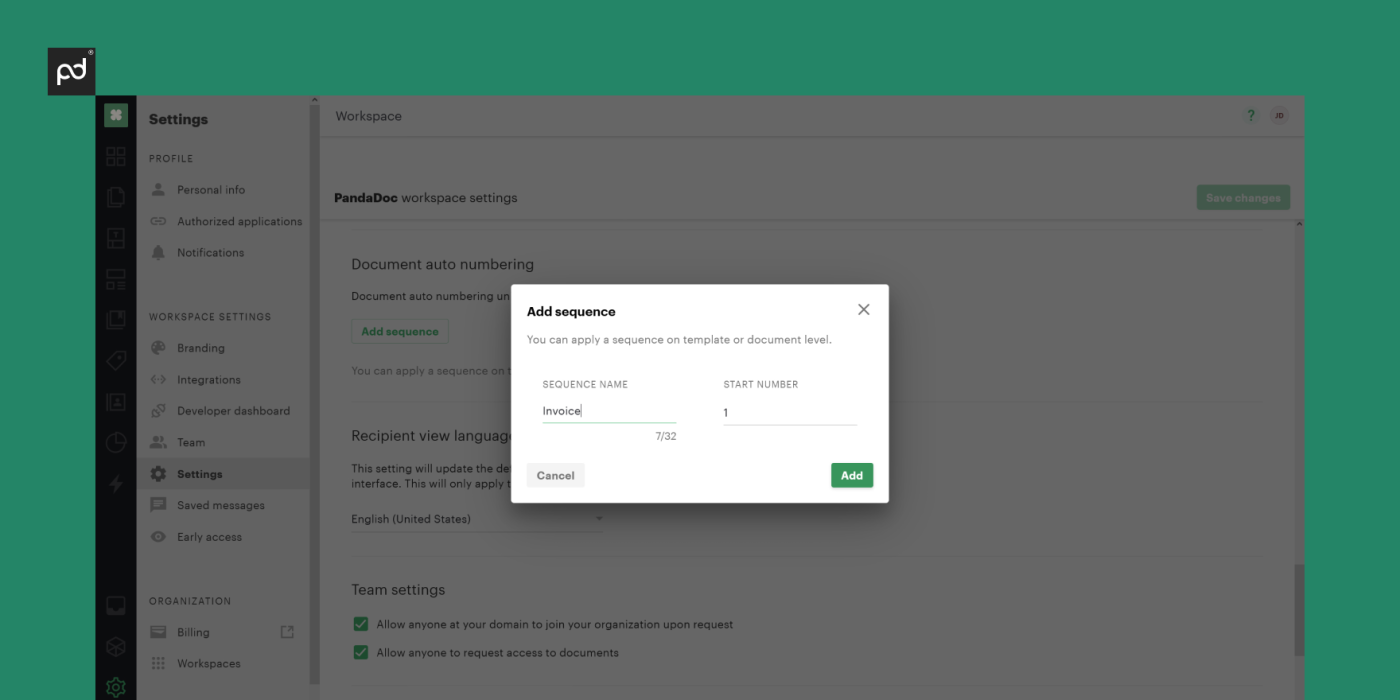
2. The next step is to scroll to “Document auto numbering,” choose “Add sequence” and start number invoices.
3. When done, select “Add.”
Step 4. Display the dates
Dates make the invoice clearer and give reference points that both you and your client can use when it comes to payment due dates.
The three key dates to add are:
- The date the service and/or goods are supplied
- The issue date of the invoice
- The due date of the invoice
Most commonly, issue and due dates are listed at the top of the invoice, while the supply date is near the description of goods and services.
Step 5. Enter list of goods or services
There is no need to describe the entire work — avoid unnecessary text whenever possible — though there should be enough details for the recipient to know what they’re paying for.
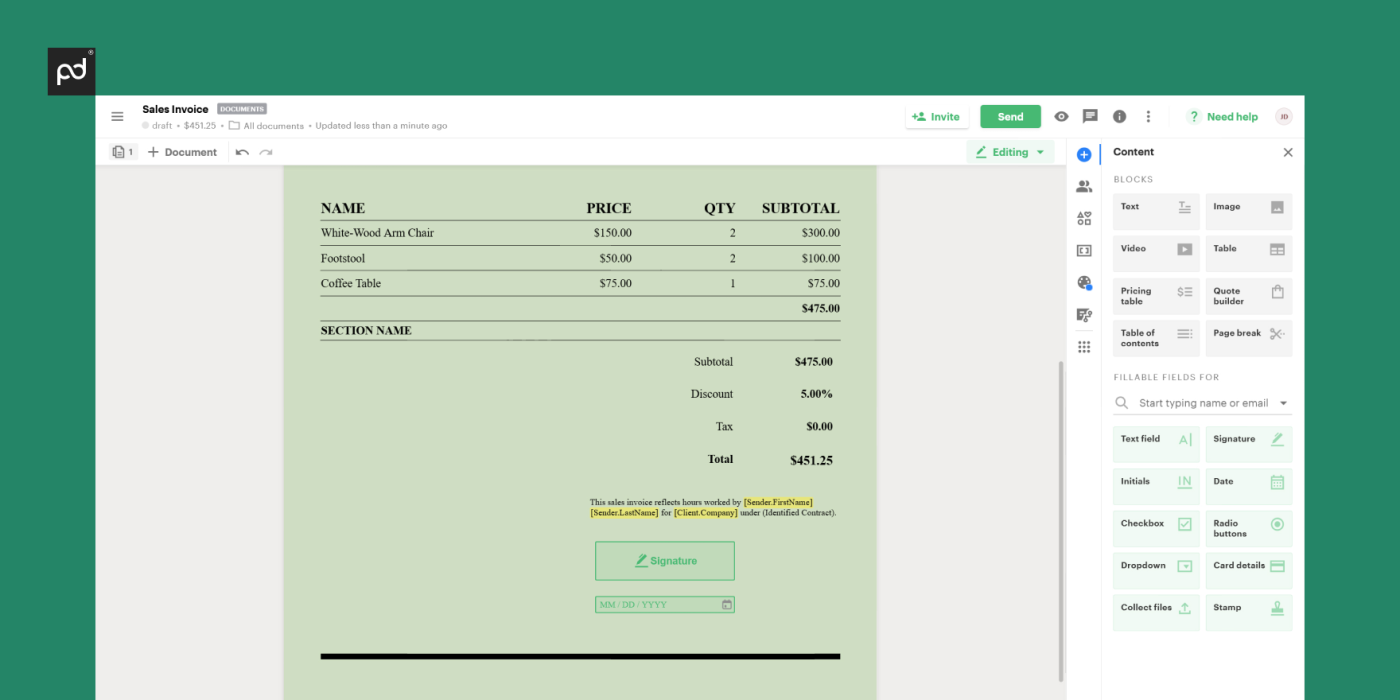
The best practice is to add a small description of each product/service and the quantity for each on your invoice in a form of table.
PandaDoc makes it easy to build your own product catalog and pricing table.
This feature automates data entry, aids in data consistency, ensures correct information and reduces human errors.
This is how it may look like:
Step 6. Display pricing details
Add pricing details on the same table where you listed the services or products supplied and their quantities:
- A column for unit price per product/service
- A column for the quantity of each product/service
- A row for the total cost for each line of service/product (unit price × qty)
- A column in the end with the sum of all invoice lines
Step 7. Choose payment method
There are several payment methods you can consider, and keep in mind whether it is both possible and convenient for the recipient to pay via your preferred method.
Most common options are:
- Credit & debit cards (payment online with a credit card or a billing service provided by PSPs like Payoneer, Wise, etc.)
- Cash payments (may require tax auditing as fewer paper trails are linked to cash)
- Online payments (via online/global payment solutions, to your debit/credit card, local bank accounts, or even cash wallets)
- Bank transfer (ACH transfer & wire transfer)
- Check (though checks are prone to fraud and may cause several issues like bouncing or taking much longer to process than other methods)
- Cryptocurrency (has grown in popularity due to speed, though is largely unregulated and requires you to check local rules regarding taxes)
Step 8. Add sales tax
The VAT, or sales tax for transactions taking place in the EU, should be added. This will make up the total sum owed for the invoice.
If you run a business within the US, taxes vary from state to state.
That is why it is best to contact the IRS or state entity responsible for taxation to get more information regarding your case (you should be able to check online).
Once taxes are calculated, add it to the subtotal, writing down the total cost near the bottom of the invoice and e-sign the document.
