How to sign a loan agreement online
When you loan someone money, you need proof that the loan was not a gift to the borrower. A loan agreement is proof of your commitment and outlines the terms of your loan.
It is important for both parties to be protected by a loan agreement which is why it needs your signature and theirs.
What is a loan agreement?
A loan agreement is a complicated legal document that binds and protects two or more parties entering into a lending agreement.
Loan agreements exist to detail exactly how much money has been lent and the specific requirements related thereto.
The lender, who sets the terms of the loan regarding interest rate, loan duration, and repayment payment period, forms most loan agreements.
Other terms settled in the initial agreement will include the loan amount, whether the loan is issued as a lump sum (most common) or periodic disbursements, and what happens if the borrower defaults on the loan.
The borrower then signs a promissory note certifying their promise to repay their personal loan per the agreed-upon terms.
There are many reasons to enter into a loan agreement. For instance, a family member borrowing money might take out a personal loan to purchase real estate.
Depending upon the terms of the loan agreement, the borrower then makes periodic loan payments (typically monthly payments), which will positively or negatively impact the borrower’s credit score depending upon compliance with the loan contract.
Whether you’re taking out a personal loan to start a business, purchase real estate, or create some financial breathing room, you need to have an ironclad loan agreement when any amount of money is borrowed or loaned.
Loan agreements can be difficult to draft because loan documents are legally binding contracts, and thus must contain fields for specific information.
Complicating matters more is how different types of loan agreements require different loan terms to be included in a contract.
Luckily, PandaDoc offers its users a robust and modifiable loan agreement template to ensure all necessary fields are included in the document.
For your reference, here’s a ready-to-use PandaDoc loan agreement template
On the loan agreement template, you’ll find sections to be filled out with the details of the loan itself (amount and date), the loan delivery method, repayment details, governing laws, late payment and non-payment penalties, legal fees, successors, financing itemizations, notifications, and finally loan acceptance.
Let’s walk through how to fill out a personal loan agreement online using the PandaDoc template.
Step 1. Load the PandaDoc loan agreement template
- Log in to your PandaDoc account to access the loan agreement template. If you don’t already have one, create a PandaDoc account.
- Once you’ve signed into your PandaDoc account, click here to access the existing loan agreement template.
Note: If you have your own boilerplate loan agreement that you already use, you can upload it to PandaDoc to modify and reuse it by going to your user dashboard. Navigate to the “Content Library” button on the black vertical bar on the left-hand side of your browser pane. From the Content Library, click the green “CREATE” button in the upper right-hand corner of your browser window, and select “Upload.”
Step 2. Fill in the lender and borrower information
You’ll find fields for all necessary information on the lender and borrower at the top of the loan agreement.
The green boxes on the document are required text fields that you must fill in to be able to complete the document.
- To get going, double-click in the green Lender Name text field already placed on the document.
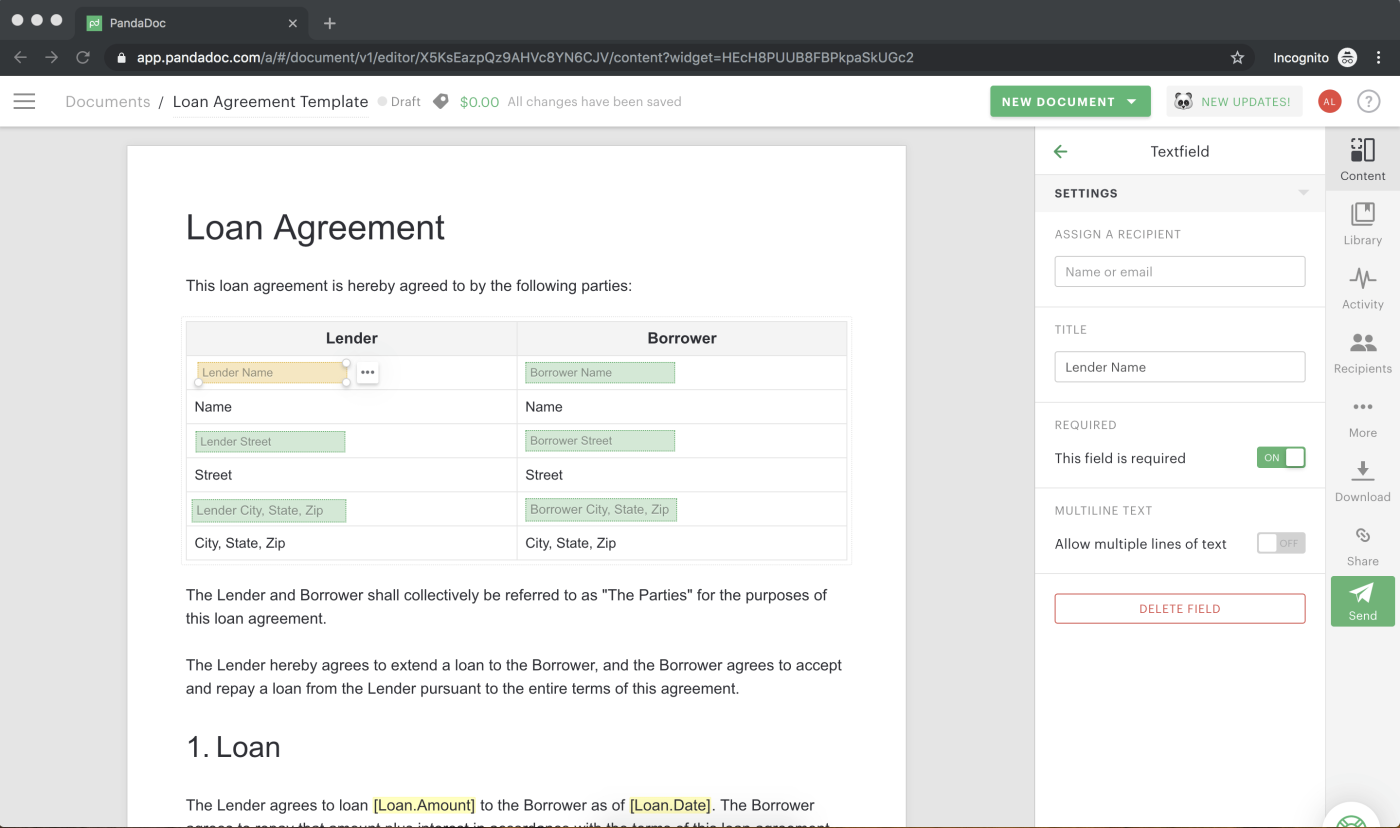
Note: When you first click on one of the green text fields, the first option you’re given on the right side of your browser window is to assign the text field to a recipient or contact. This is because PandaDoc features are geared toward collaborative document sharing, and selecting a recipient creates an arrow tab on the document that will show them where they need to input their information.
- In the green text field, assign it to another recipient or fill it in yourself. If you’re going to fill it in yourself, you can skip assigning it to a contact and fill it out yourself.
- Fill in the lender and borrower information, assigning any of the fields to a recipient where appropriate.
Step 3. Specify the loan amount and the date of the loan
The document features various yellow-highlighted text parameters.
- Under the 1. Loan section of the document, you’ll find yellow-highlighted [Loan.Amount] that indicates where the amount of the loan should be specified.
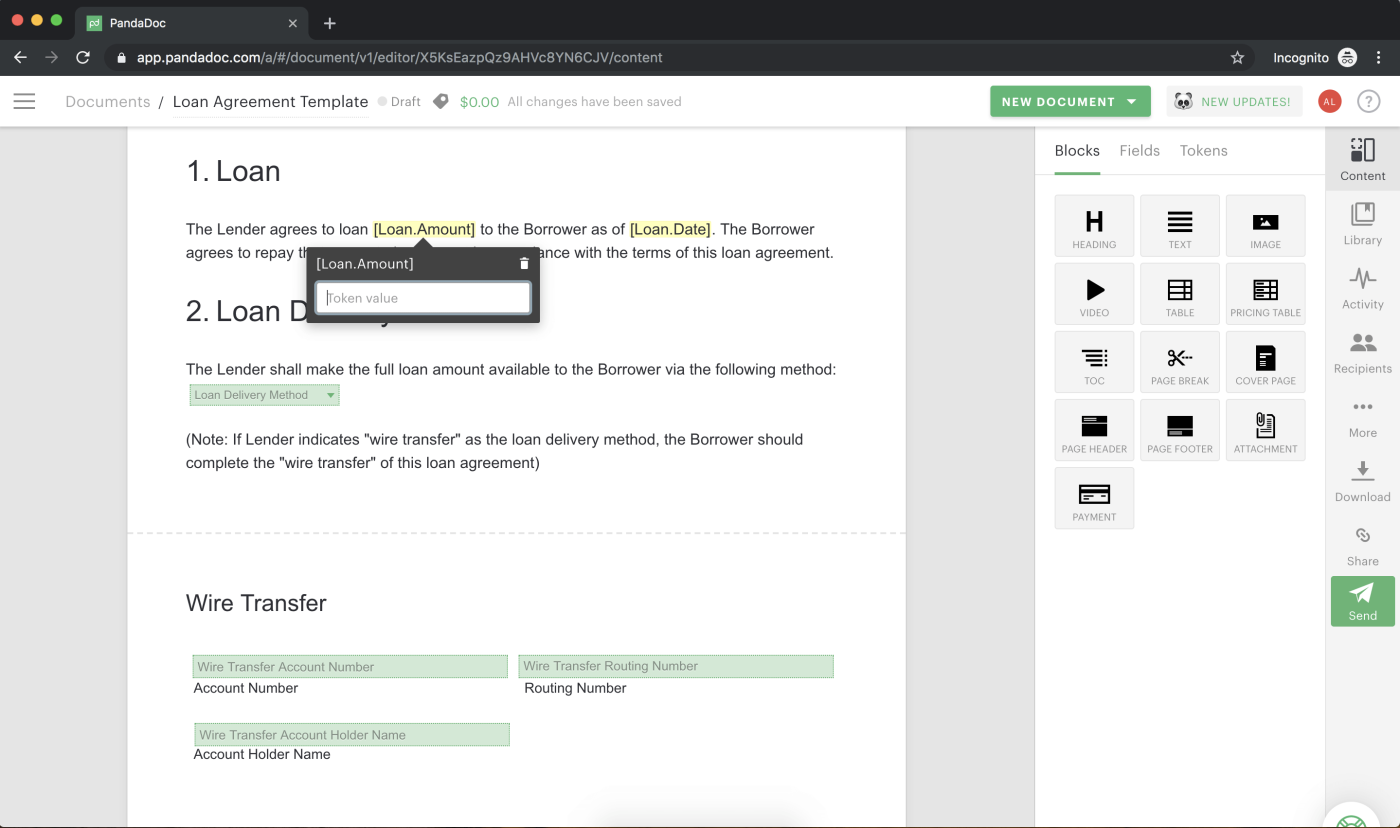
- Navigate to the field where you can fill in the appropriate information for these yellow-highlighted parameters by going to the Tokens tab on the right side of your browser window.
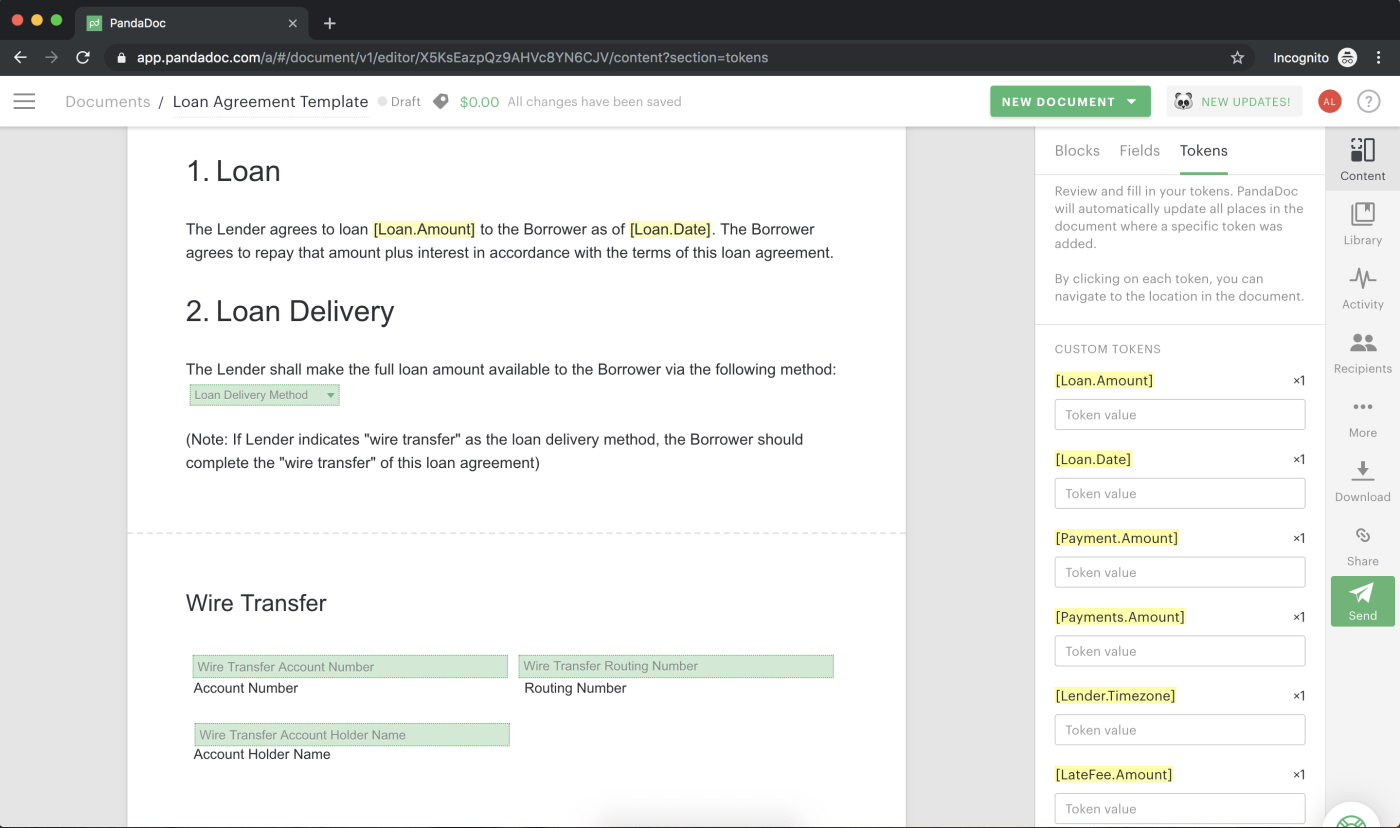
Here you’ll find all of the yellow-highlighted parameters for the entire document. You can fill them all in now, or come back to them intermittently as you proceed through the document.
Step 4. Specify the loan delivery method
This section of the PandaDoc loan agreement template designates your loan delivery method, or how the agreed-upon loan amount will be disbursed.
The existing template features a modifiable dropdown menu box with the options Cash, Check, and Wire Transfer pre-populated for you.
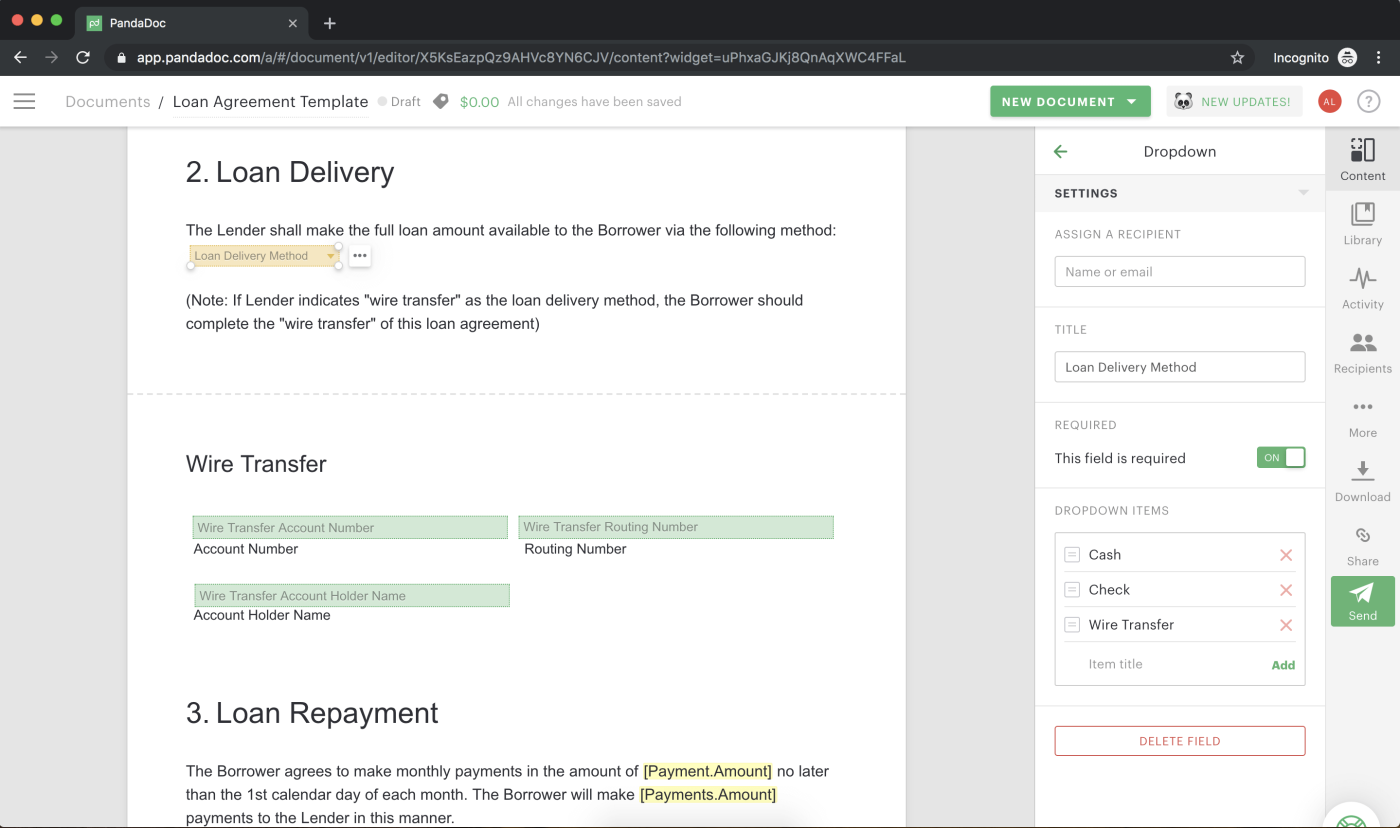
- Select how the personal loan will be delivered by choosing the appropriate option from the Loan Delivery Method box.
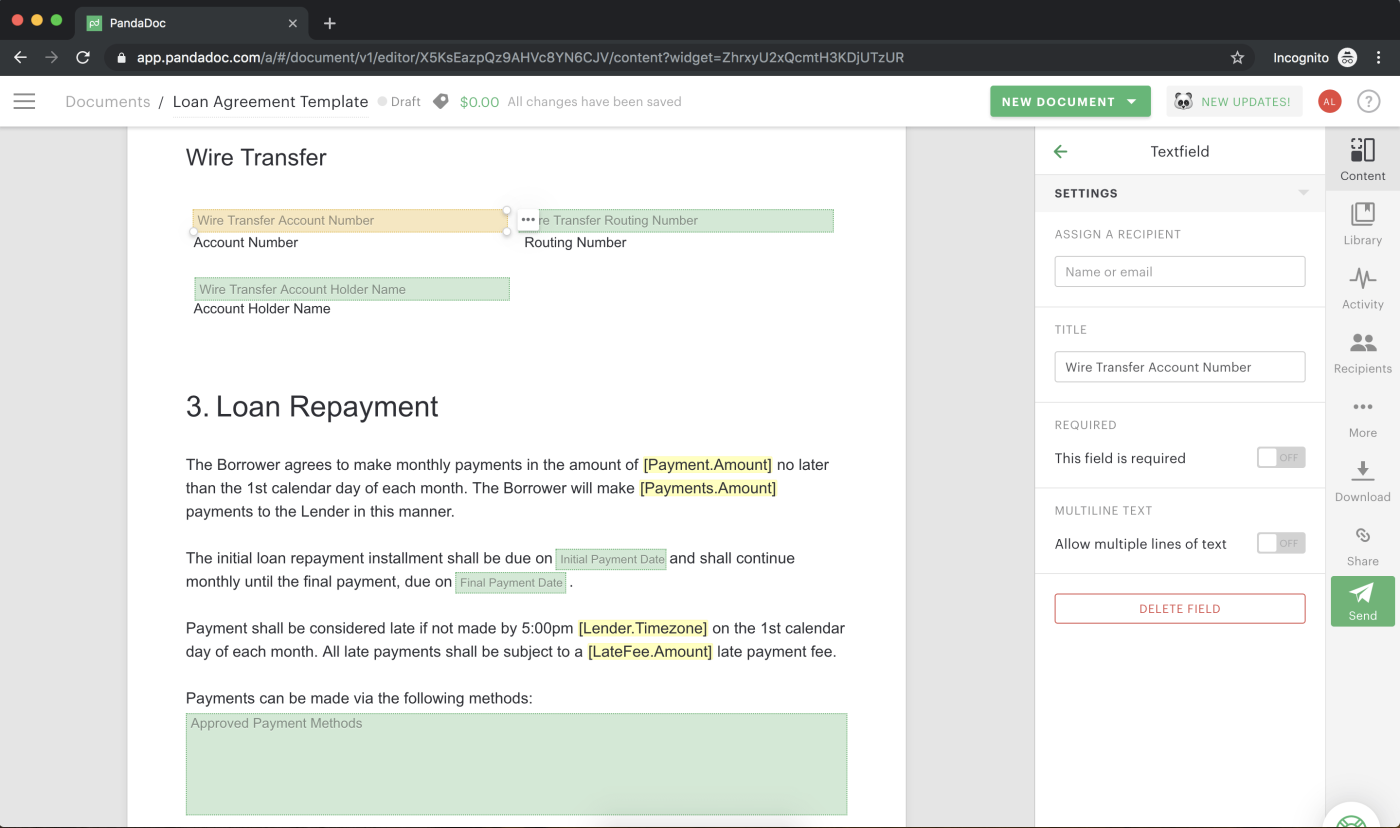
- You’ll need to fill in the bank account number and routing information if the loan is to be disbursed by a Wire Transfer.
- Fill in the details of the account and routing information, or assign these fields to a recipient following the same steps as in previous sections of the loan agreement template.
Note: If you need to add a new delivery option, click in the Loan Delivery Method box and navigate to Dropdown items under the Dropdown settings on the right side of your browser window. Enter the new option you want to appear there where you see the Item title in gray text and then click the green Add immediately next to it.
Step 4. Fill in the details of the loan repayment schedule and regular payment options
- Replace the yellow-highlighted [Payment.Amount] with the minimum monthly loan payments.
- Double-click in the green text fields to specify the dates of the initial payment and the final payment.
- Specify the time zone where the payments are received and any late fees by replacing the yellow-highlighted [Lender.Timezone] and [LateFee.Amount] respectively.
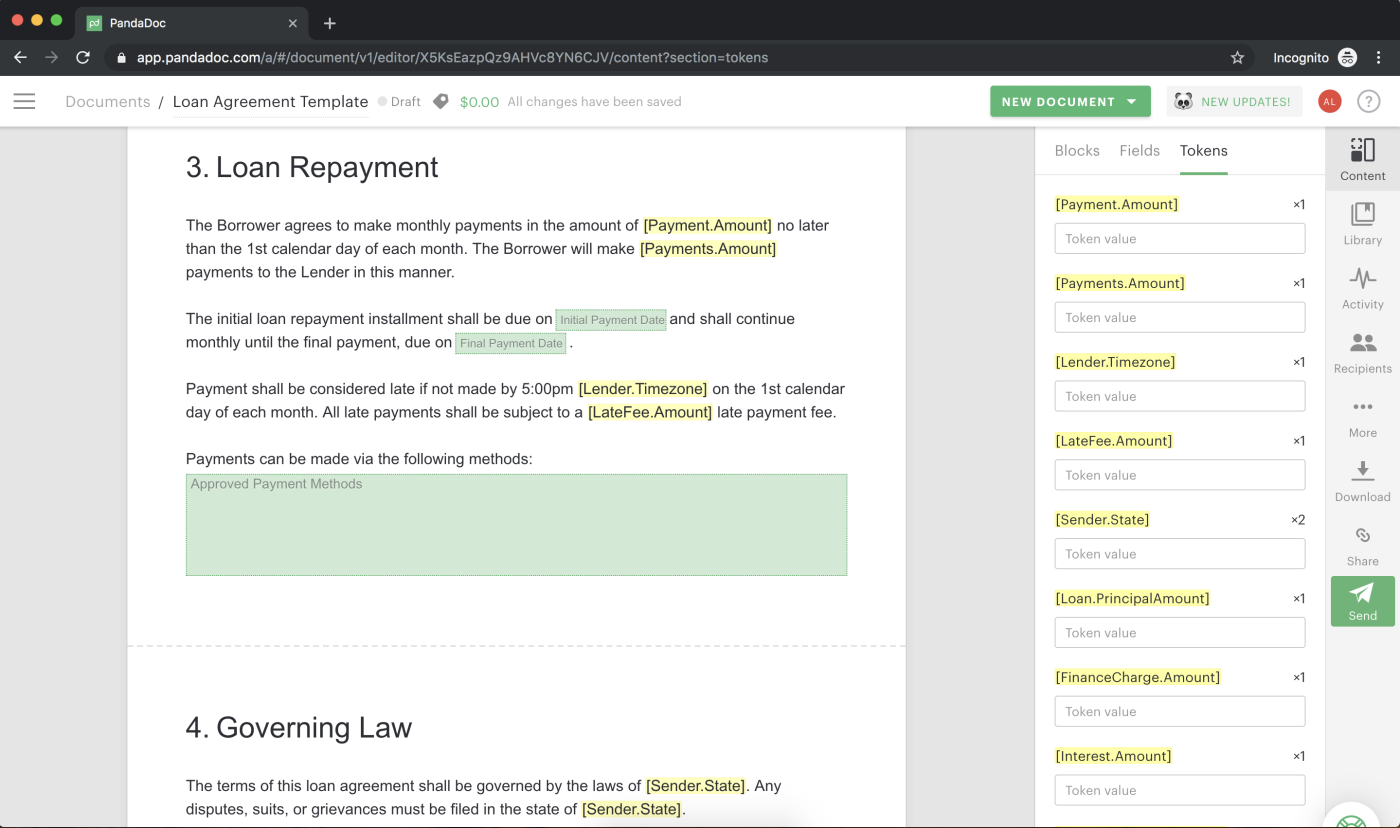
Set what forms of payment are acceptable by double-clicking in green the “Approved Payment Methods” text field box and entering payment options.
Step 5. Specify what region’s laws govern the loan agreement
- Replace the yellow-highlighted [Sender.State] with the state where the lender does business.
This sets what region’s laws govern the loan contract, and will impact any litigation that may arise in the event of something like if the borrower defaults after missing enough monthly payments.
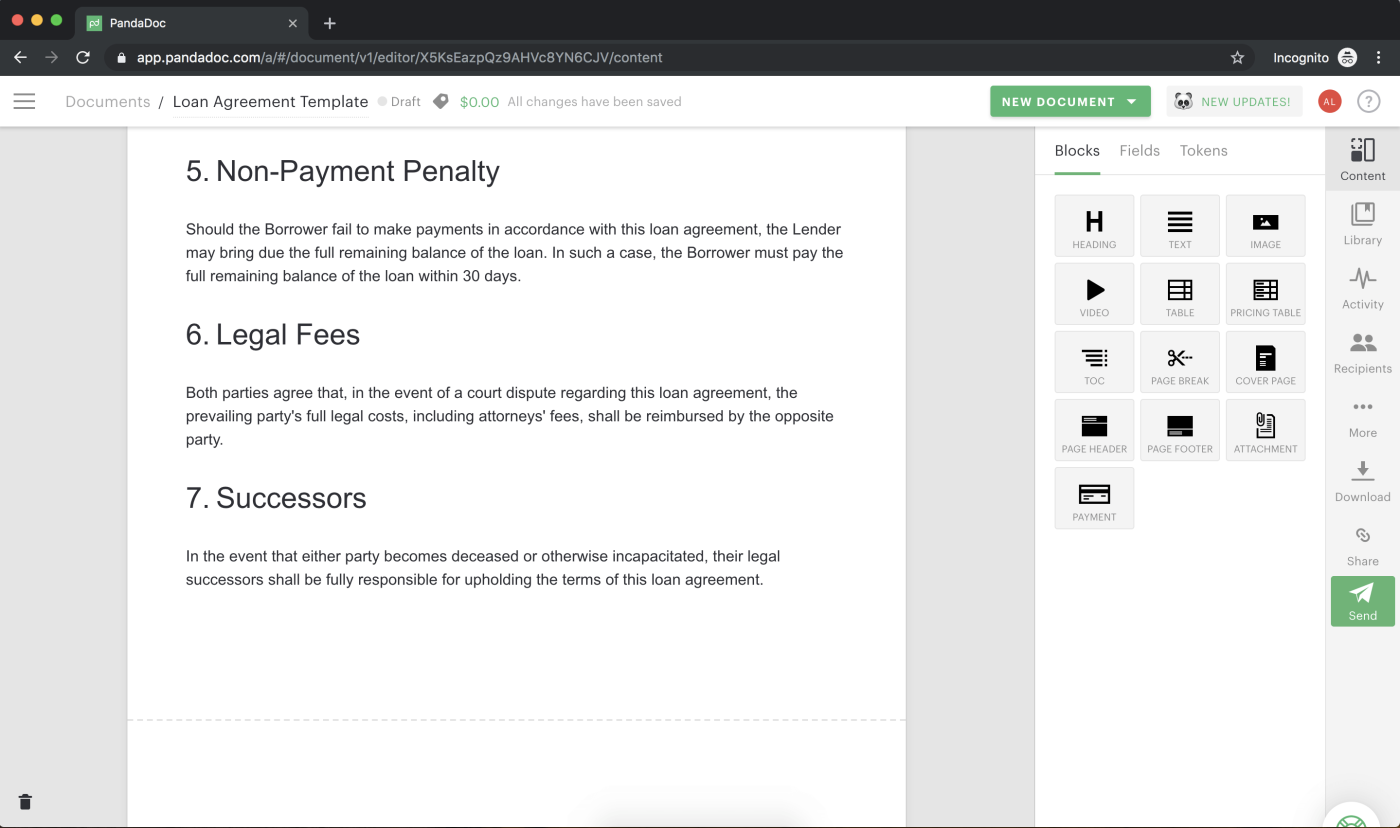
Step 6. Review the Non-Payment Penalty, Legal Fees, and Successors sections
These sections are boilerplate, and should not need to be modified in most situations. Generally speaking, only legal professionals should modify these sections.
Step 7. Fill in the Financing Itemization details
Here you’ll set financial terms related to things like interest rate. As in previous sections, replace the yellow-highlighted text with the appropriate information.
Step 8. Fill in the “Notification” and “Acceptance” sections of the document
- Double-click on the green text fields to fill in these fields or assign them to another recipient.
- Under the Acceptance section, double-click in the Signature box to select the type of legally binding digital signature you’d like to add to the document.
If you’re the lender, you’ll enter your signature and assign the borrower’s signature to the borrower as the recipient.
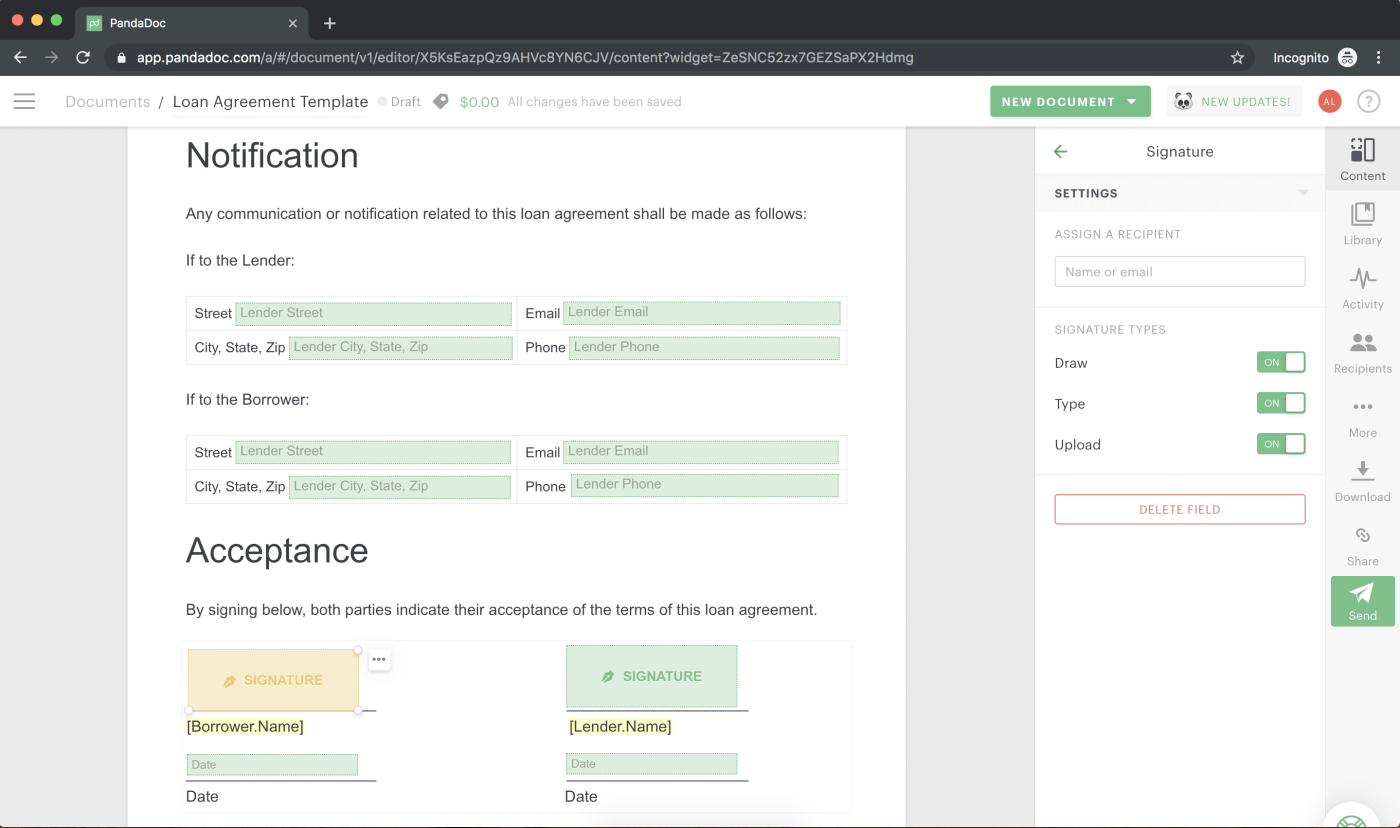
Make sure the yellow-highlighted text below the signature that specifies the borrower name, lender name, and sender company has all been replaced with the relevant information.
- Double-click on the green Date text field and select the date you’re signing the document from the popup calendar.
Step 9. Complete the document
Give the document a thorough check for the accuracy of all information.
Remember, this becomes a legally binding document once signed by all parties, so it is vital for the protection of everybody that the document contains no errors.
Once you’re confident that the loan agreement is error-free, click the green Complete button on the right side of your browser window.
This will check through the document for any incomplete or unassigned fields.
If the PandaDoc software finds no outstanding fields, it will change the green Complete button to a green Send button, which you can click to send the document to the specified recipient(s) for completion on their end.
You’re finished! Ready to protect your money and sign your loan agreement?
To draft your first loan agreement, create a PandaDoc account, then complete and sign your loan agreement online.
Need to eSign a 3rd-party loan agreement? Sign in to your PandaDoc account to legally sign your loan agreement. Let’s get signing!
PandaDoc gets any document you need, signed faster.
End-to-end integration with 3rd-party apps means convenient and accurately documented information accessible whenever you need it.