How to easily insert electronic signatures in Google Docs
Adding a signature in Google Docs is quick and easy.
You can either insert a Google drawing of your handwritten signature, drag and drop an image of your signature into Google Docs, or use an add-on to sign your document.
That’s right! It’s completely possible to add electronic signatures to your Google Docs and you don’t even need to leave your document window.
Let’s look at the above three methods in more detail, and learn how to insert a signature in Google Docs.
How to sign a Google Doc: 3 easy methods
1. Sign by inserting a Google Drawing of your handwritten signature
You can add an e-signature to your Google Docs document by using the Drawing tool in Google Workspace.
If you’re unfamiliar with it, the Drawing app is the onboard drawing and editing tool. It’s not as powerful as a professional drawing app, but it’s enough to get the job done.
Here’s how to sign a Google Doc with Google Drawing:
1. Open the Google Doc you want to sign.
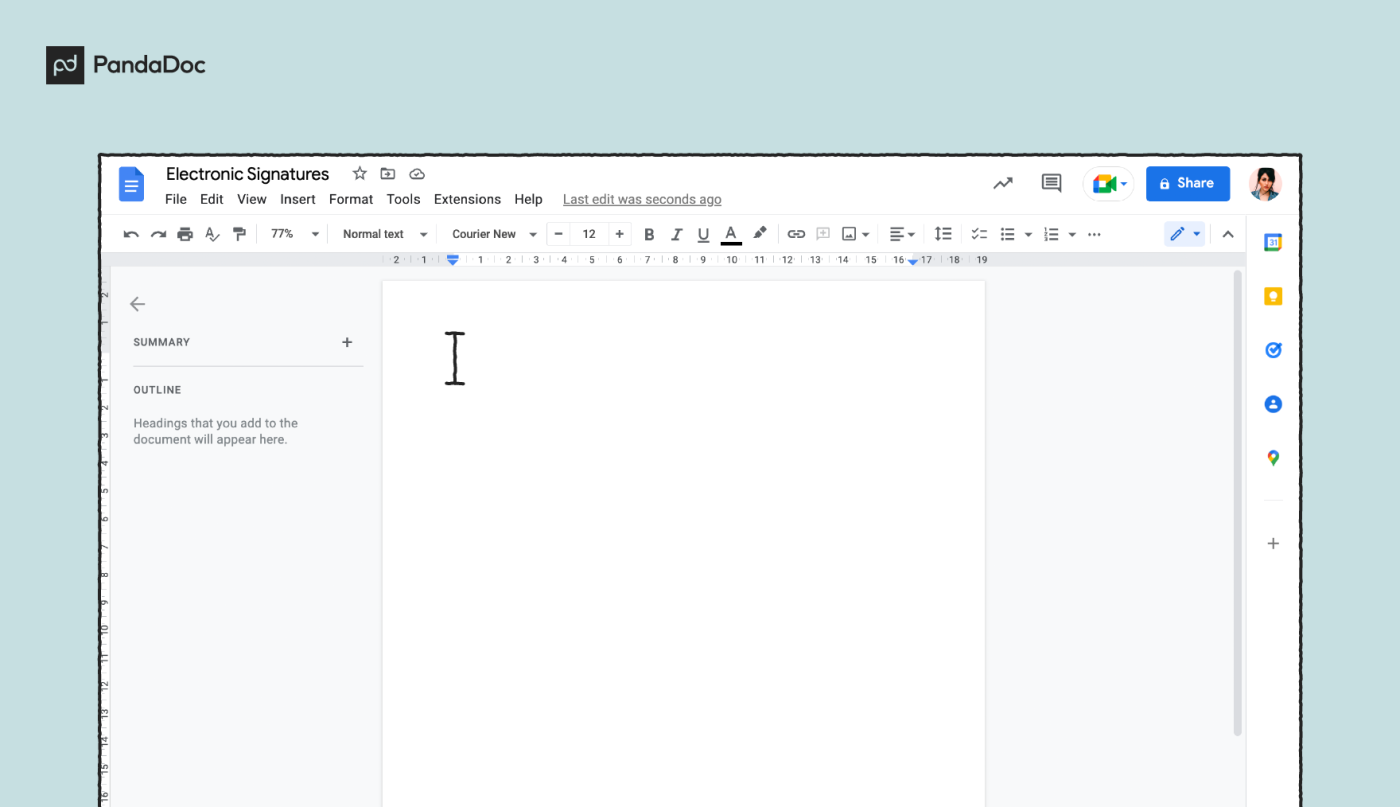
2. Place your cursor on the line where you want your signature to appear.
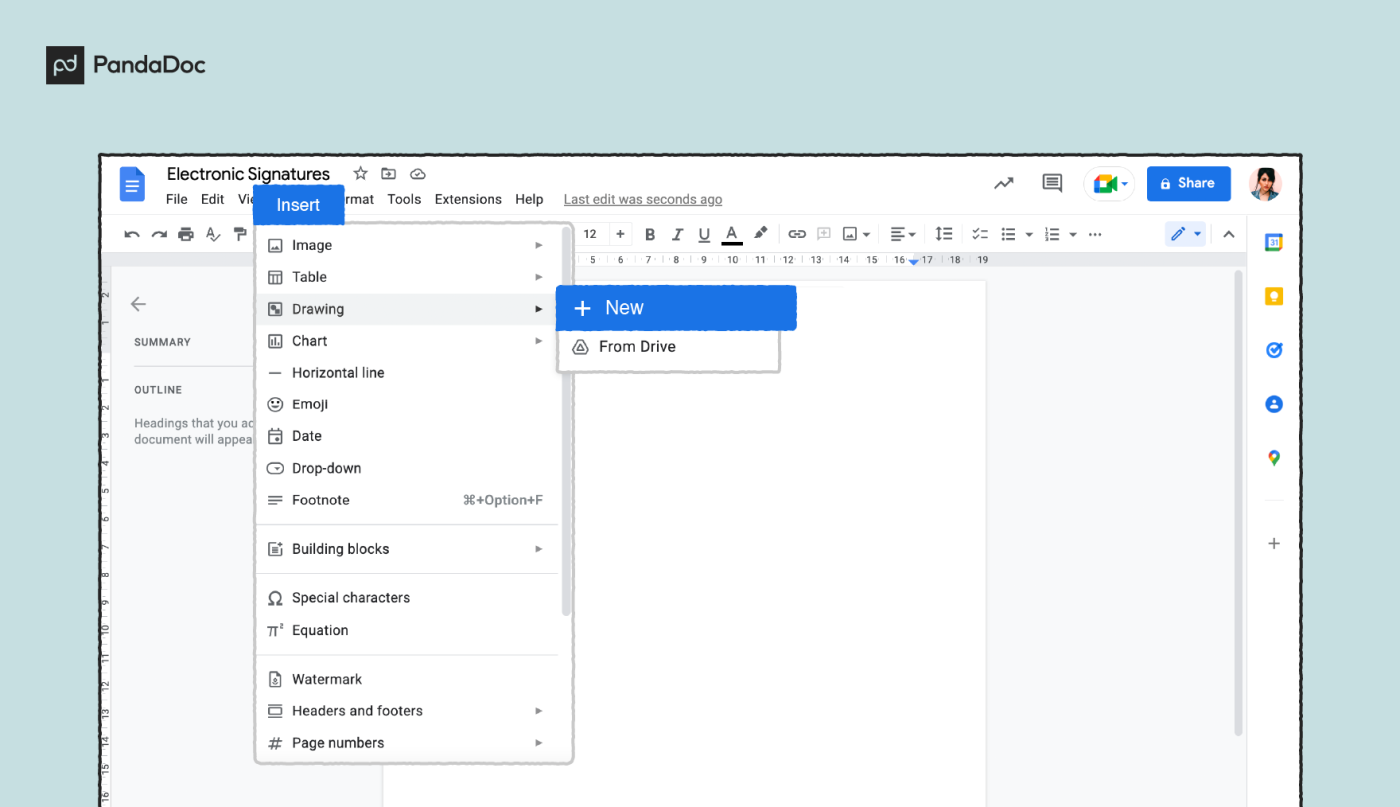
3. On the top toolbar, click Insert > Drawing > +New. The in-app Drawing tool will pop up in front of your Google Docs document.
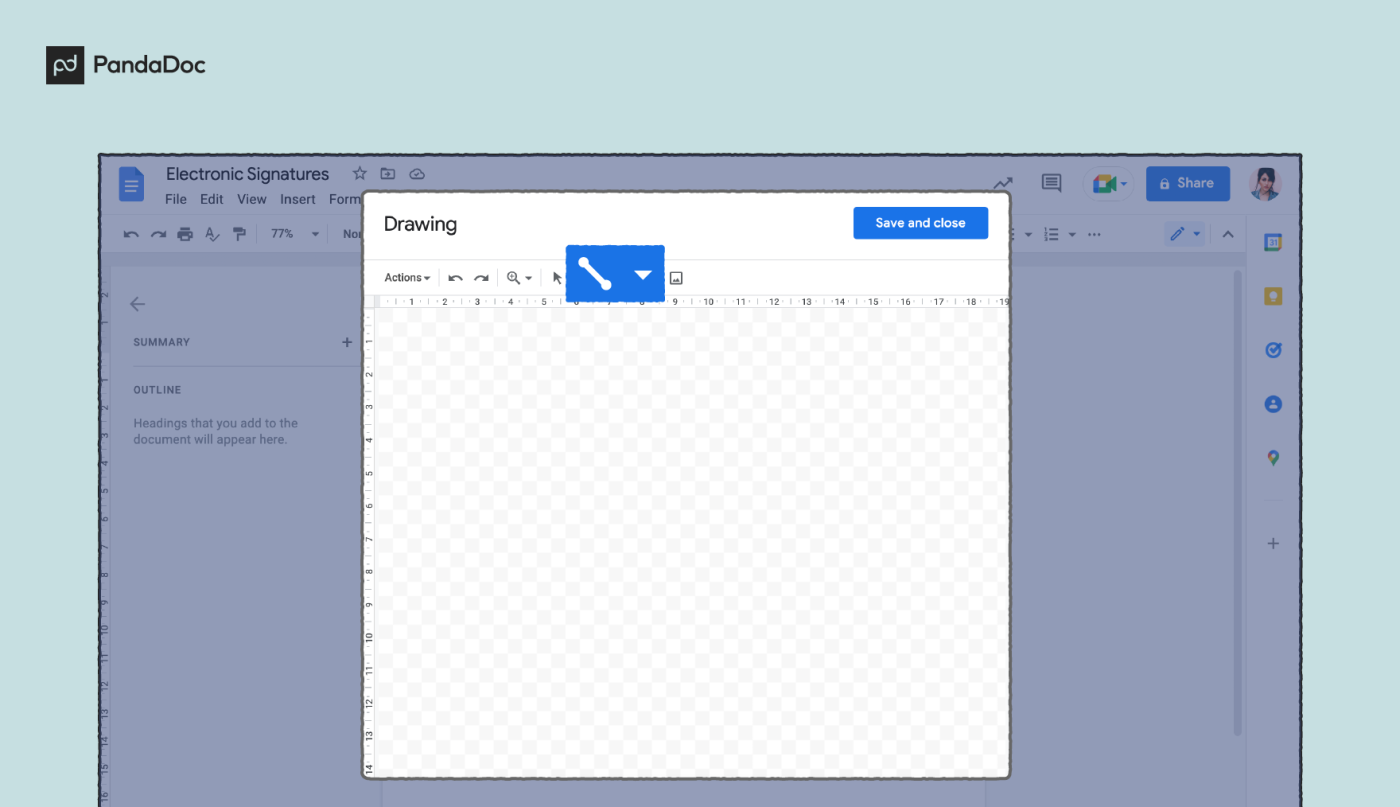
4. In the Drawing toolbar, click or tap on the Line tool (4th icon from the righthand side).
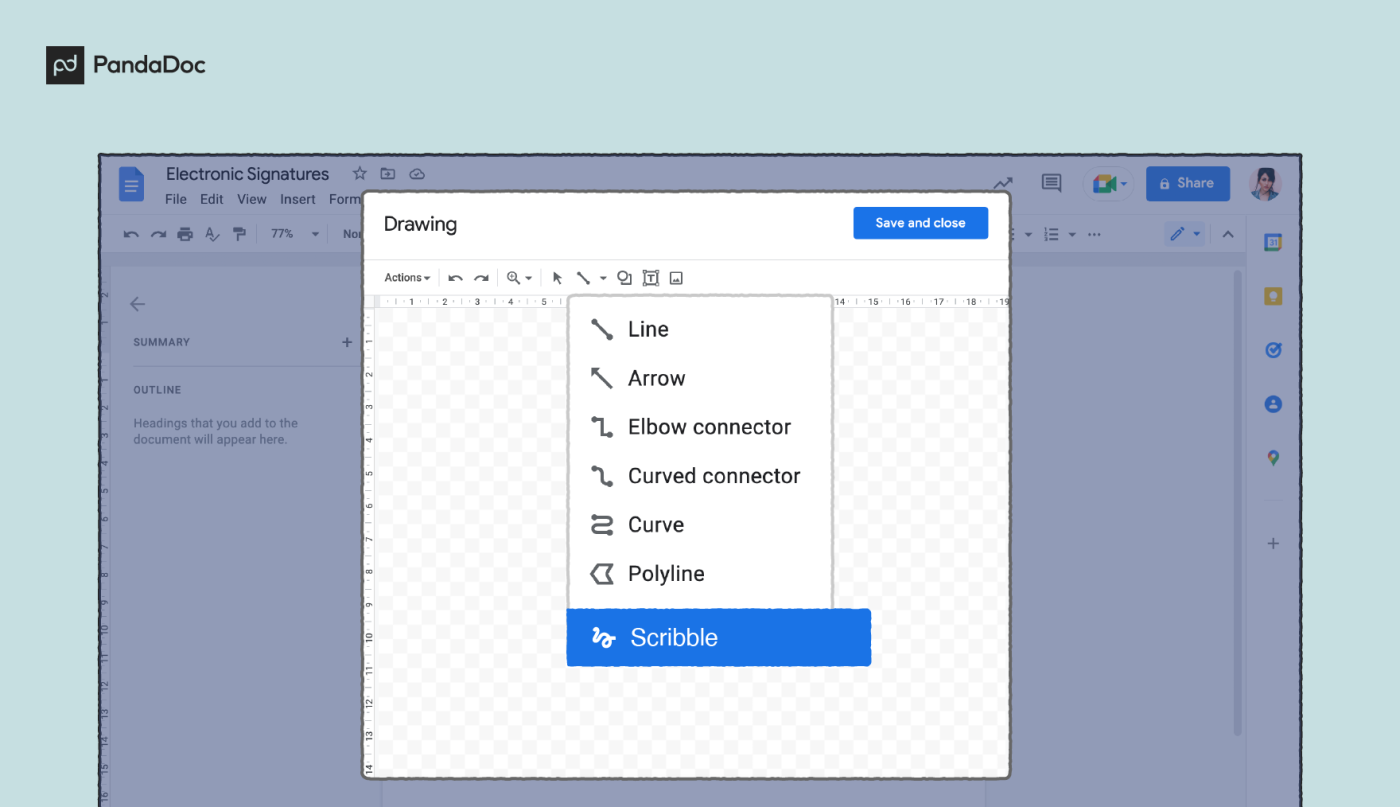
5. Select Scribble from the dropdown menu.
6. Hand-write your signature using a mouse, trackpad, or touchscreen device.
7. Click Save and Close in the top right corner of the Google Draw window.
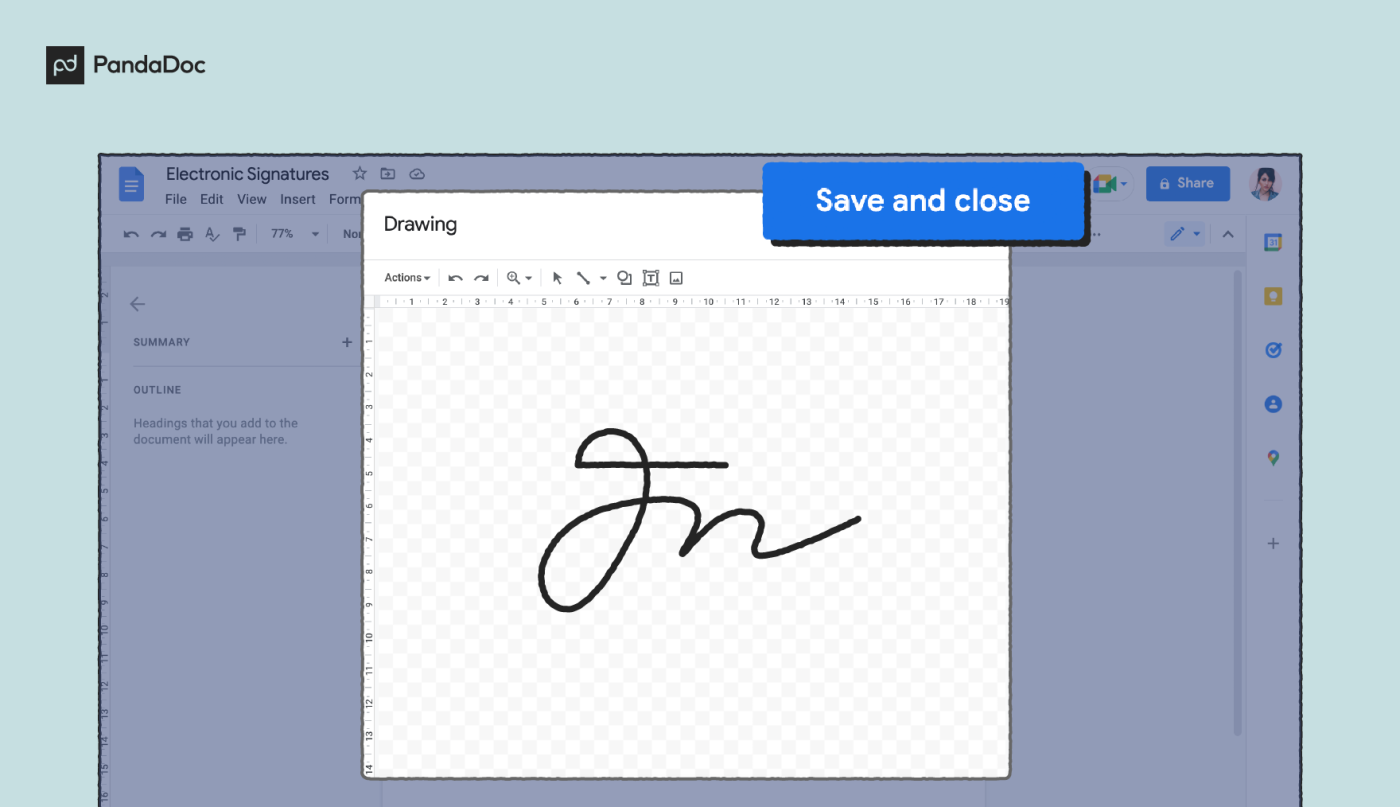
Once you hit Save and Close, the image of your handwritten signature will appear in your document.
From there, click or tap on the image to view its bounding box, then use the handles to reshape and resize your signature image until it suits your needs.
You can also change how the image responds to text by changing its alignment and text wrapping options.
Reusing your signature
Want to insert the signature you just created in other Google Docs?
No problem. To do this, select the Edit option for your image to return to the Drawing popup. Select Actions >Download and choose your preferred file type.
From there, you can download the document for signature as a JPG, PNG, PDF, or SVG file and use it again without needing to redraw it.
2. Drag and drop an image of your signature into Google Docs
So, that’s one simple way to create a signature in Google Docs. But while the Drawing tool offers great functionality when you need to sign quickly, all you’re really doing is adding an image of your signature to your document.
If you don’t feel like messing around with Google Draw (especially if you’re using G-Suite on your iPhone, iPad, or Android tablet), an online e-signature tool like CreateMySignature might be a better option.
Let’s explore how to sign a document in Google Docs using drag and drop.
Here’s what you need to do:
1. Go to CreateMySignature.
2. Sign by hand or type your signature in the signature window on the home page.
3. Click or tap the Download signature button.
4. In the Google Doc you want to sign, navigate to Insert > Image and upload your signature file to the document.
If you’re working on a Mac or PC, you can just drag and drop the image file into your document.
5. Adjust the image to taste by using the resizing and text wrapping adjustment tools.
When you’re done adding the signature to a Google Doc, you’ll still have the signature image on your device. You can use it to sign multiple documents or create pre-signed document templates with an embedded signature.
You could also upload it to Google Drive to use as an image, add it to a Microsoft Word document, or attach it to your Gmail signoff.
It’s that simple!
3. Use an add-on to sign your Google Doc
Sometimes, when adding a signature in Google Docs, you need something more secure — especially if you’re signing legally binding documents.
This is where add-ons can help.A third-party tool like the PandaDoc add-on for Google Docs can connect your e-signing platform to your Google Workspace, so creating certified digital signatures is fast and easy.
Note: You’ll need a PandaDoc account in order to sign using the Google Docs add-on. If you don’t have one already, you can sign up for a free account right here.
Here’s a quick tutorial on how it works:
1. In the toolbar of the document where you want to create your signature, navigate to Add-ons > Get add-ons.
You can also navigate directly to the page in the Google Workspace Marketplace using this link.
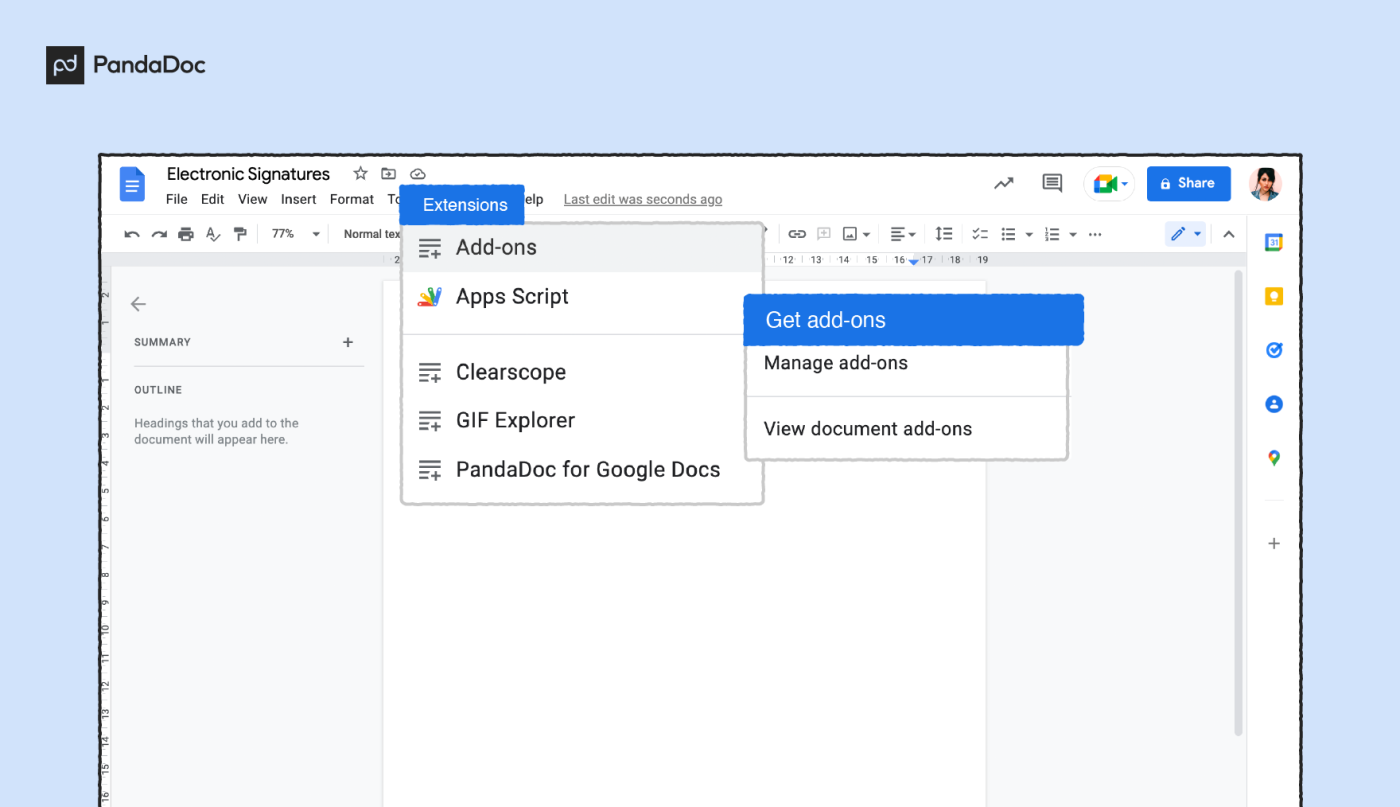
2. Enter PandaDoc for Google Docs in the text box search bar of the popup window.

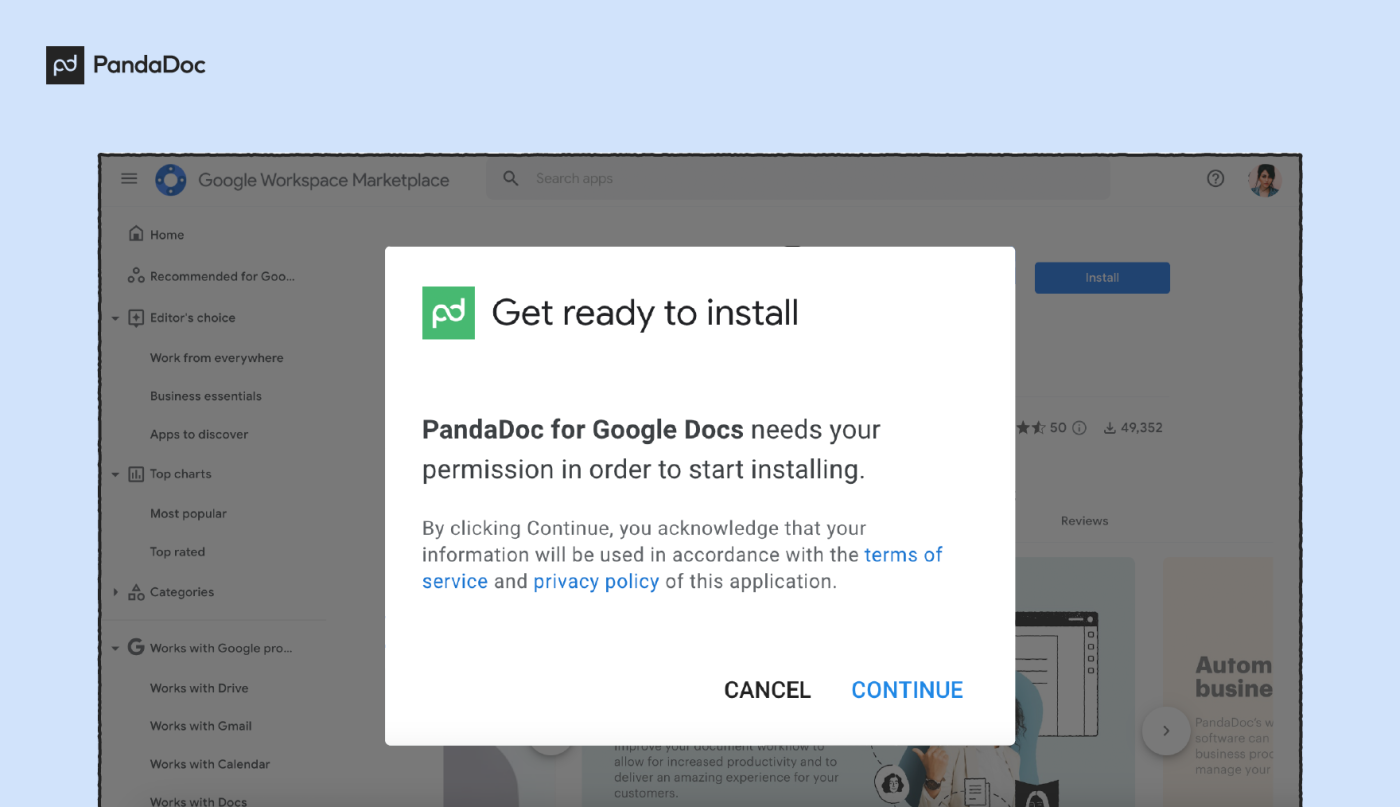
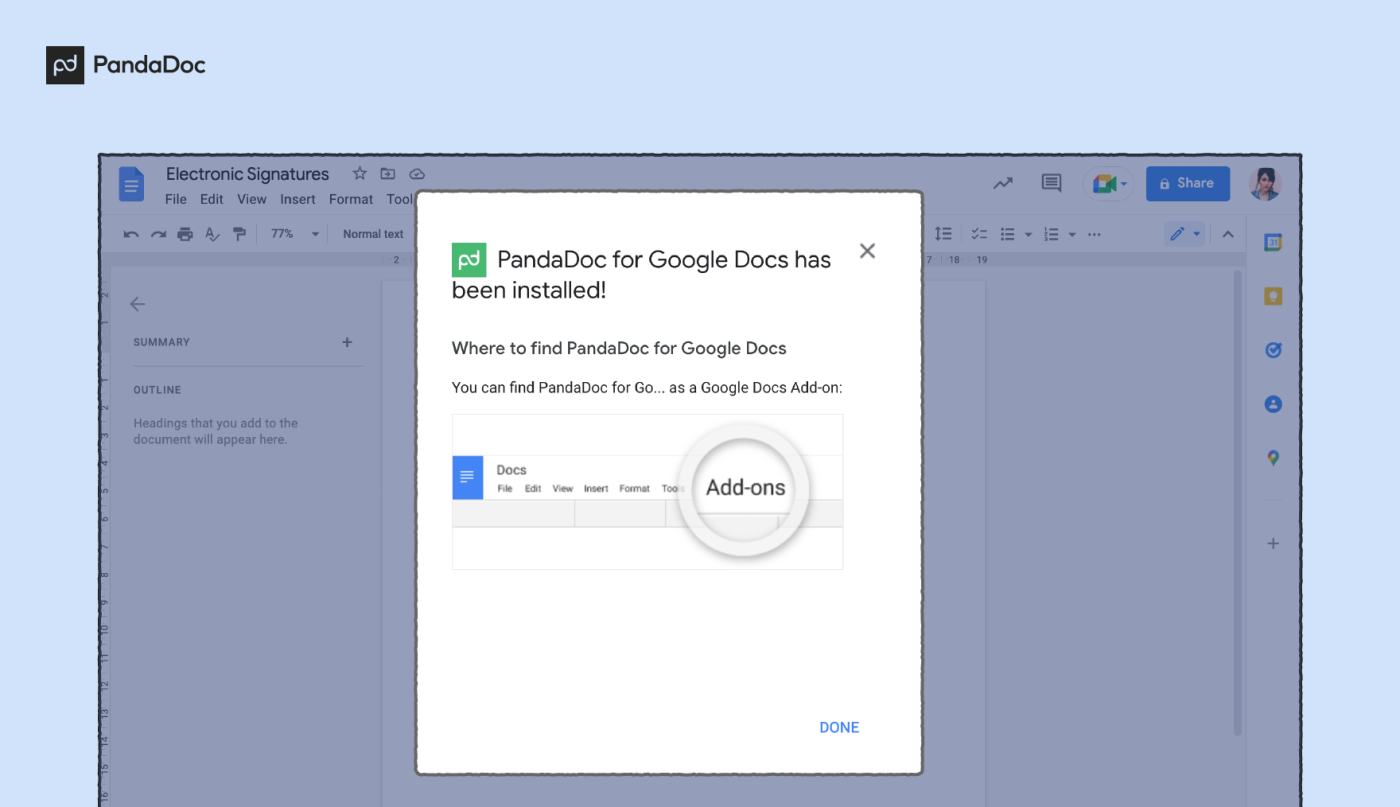
3. Select and install the PandaDoc for Google Docs add-on.
4. In Google Docs, select Add-ons from the menu bar. From the dropdown, select PandaDoc > Sign with PandaDoc.
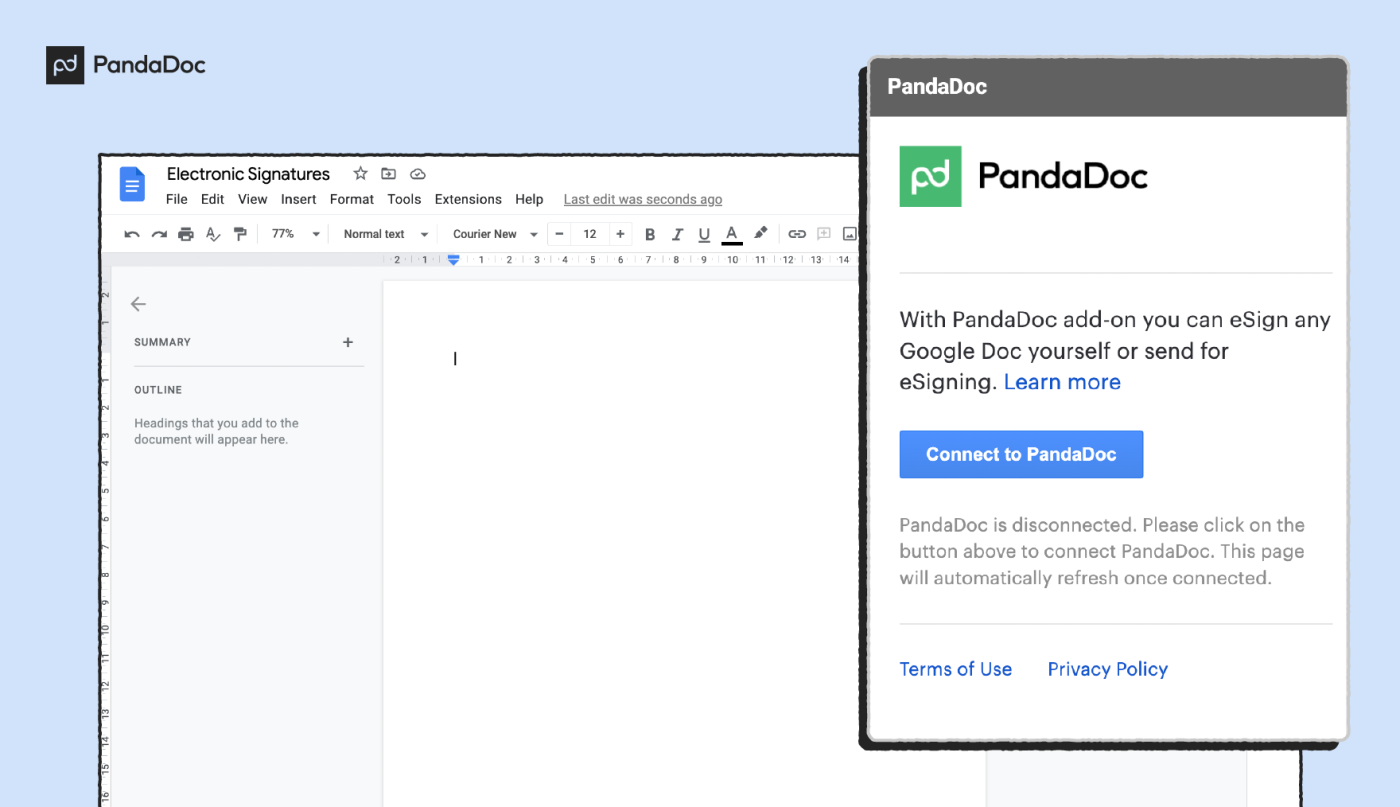
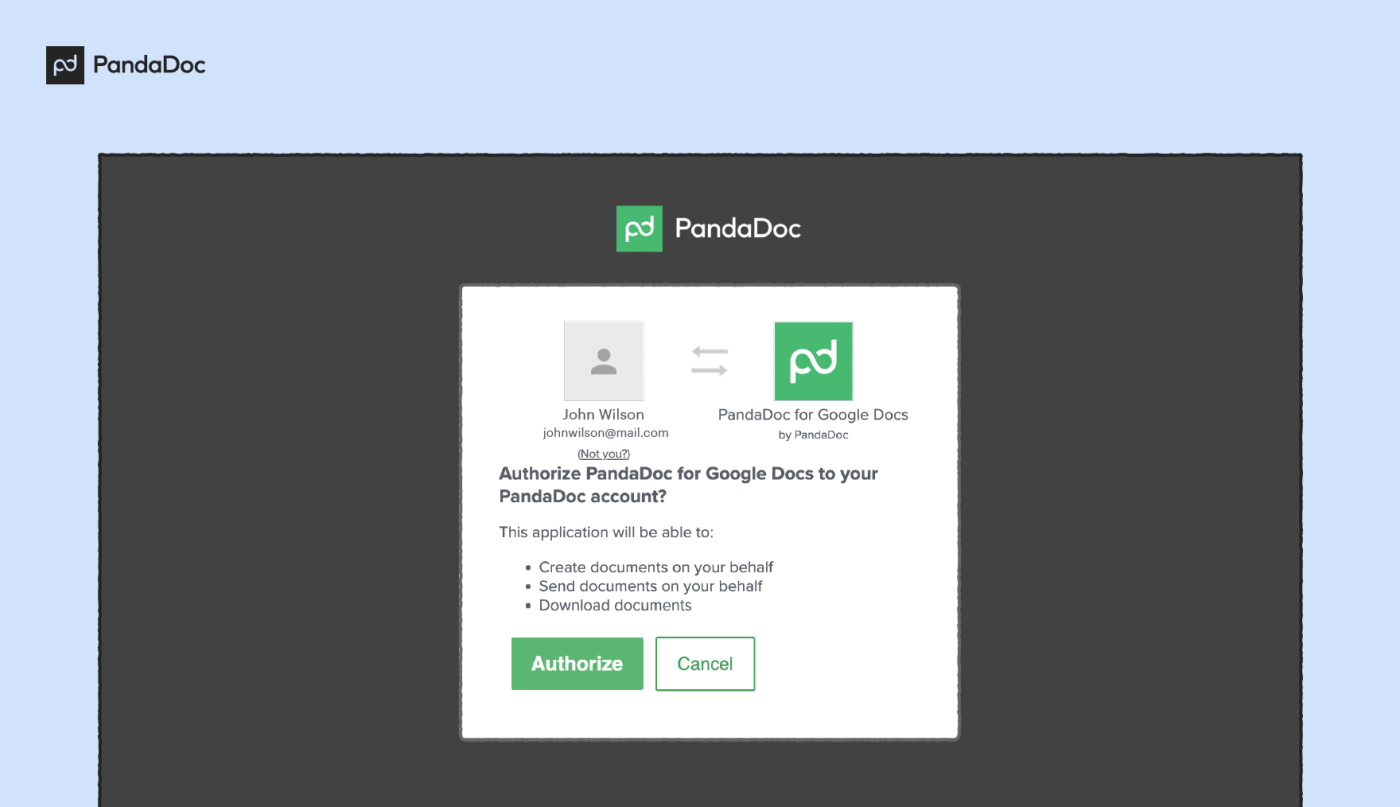
5. Follow the prompts to sign in to your PandaDoc account and connect it with your Google account.
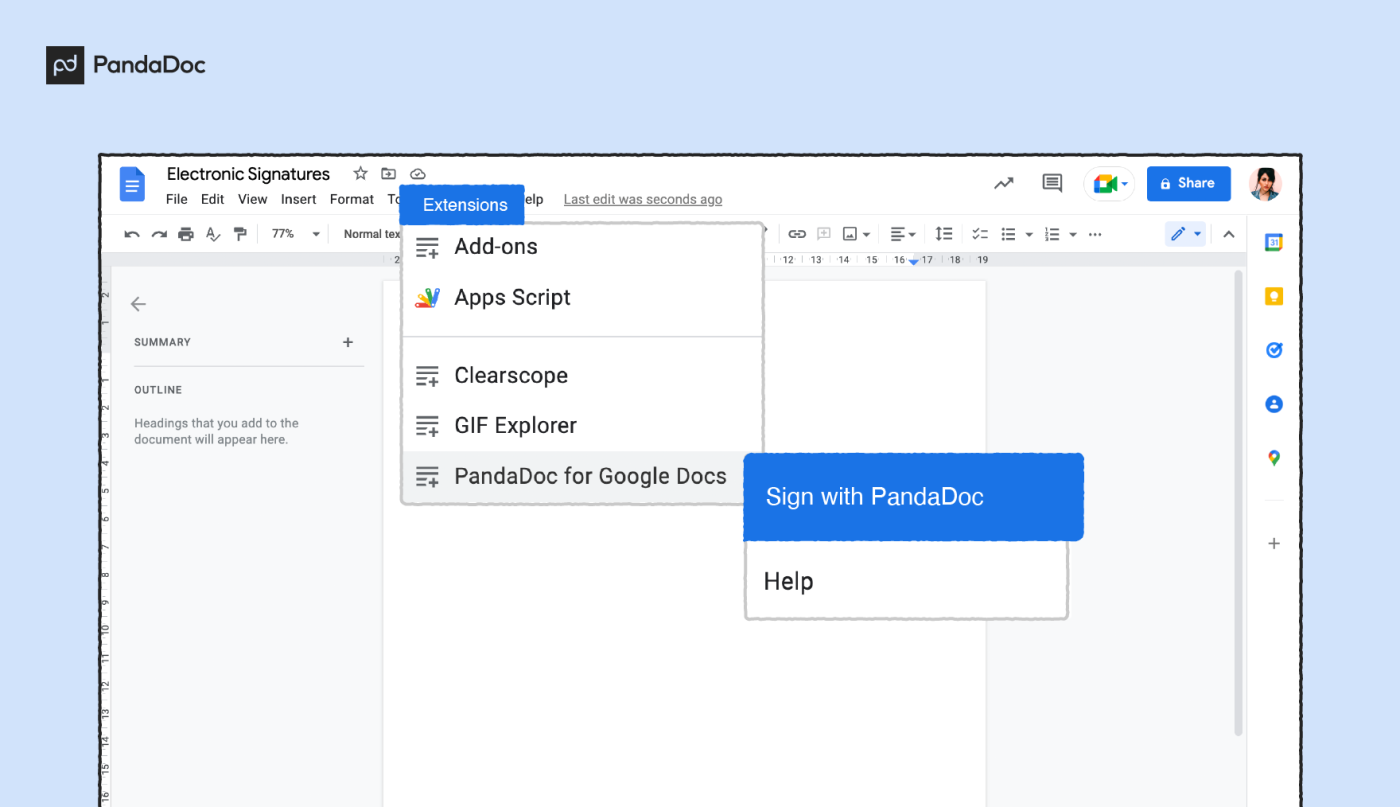
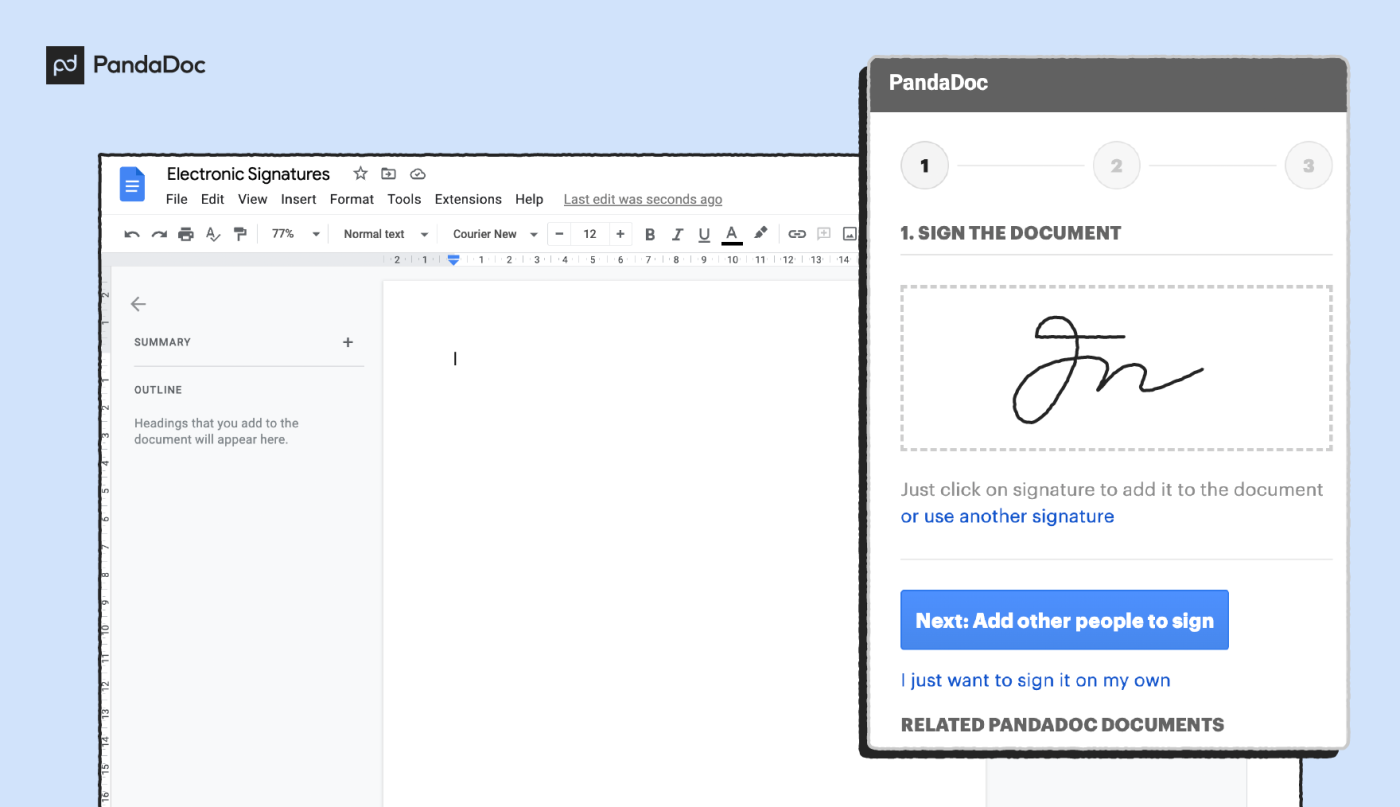
6. A dialogue box featuring a three-step signing process will appear on the right sidebar of your Google Docs document.
7. To complete the signing process, insert your own signature into the document by clicking on the signature window.
Keep in mind that if you’re using a privacy app, your signature image may be blocked. Please remember to disable any add-ons that may interfere with your PandaDoc add-on.
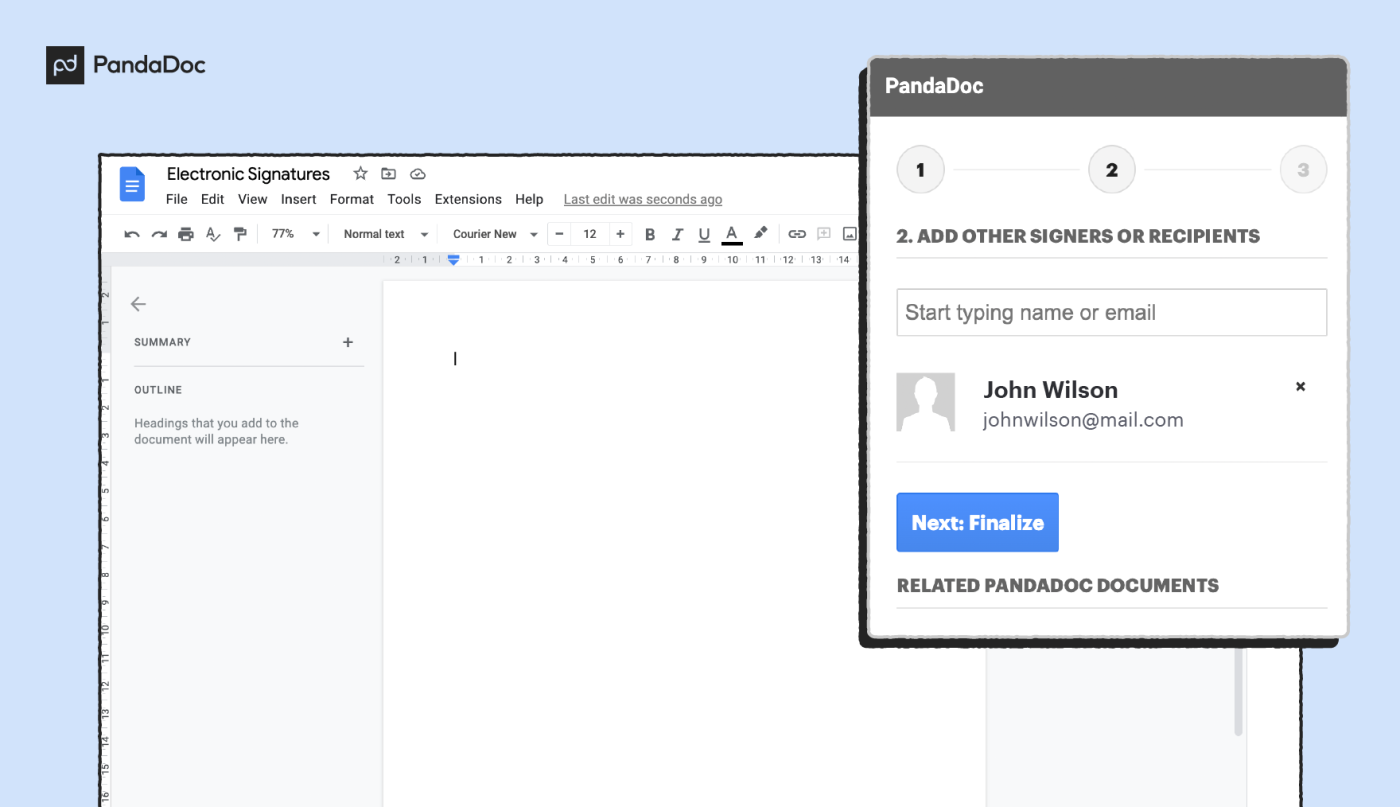
8. When you’re finished signing, select Next: Add other people to sign and enter the email address of the individual who needs to sign next.
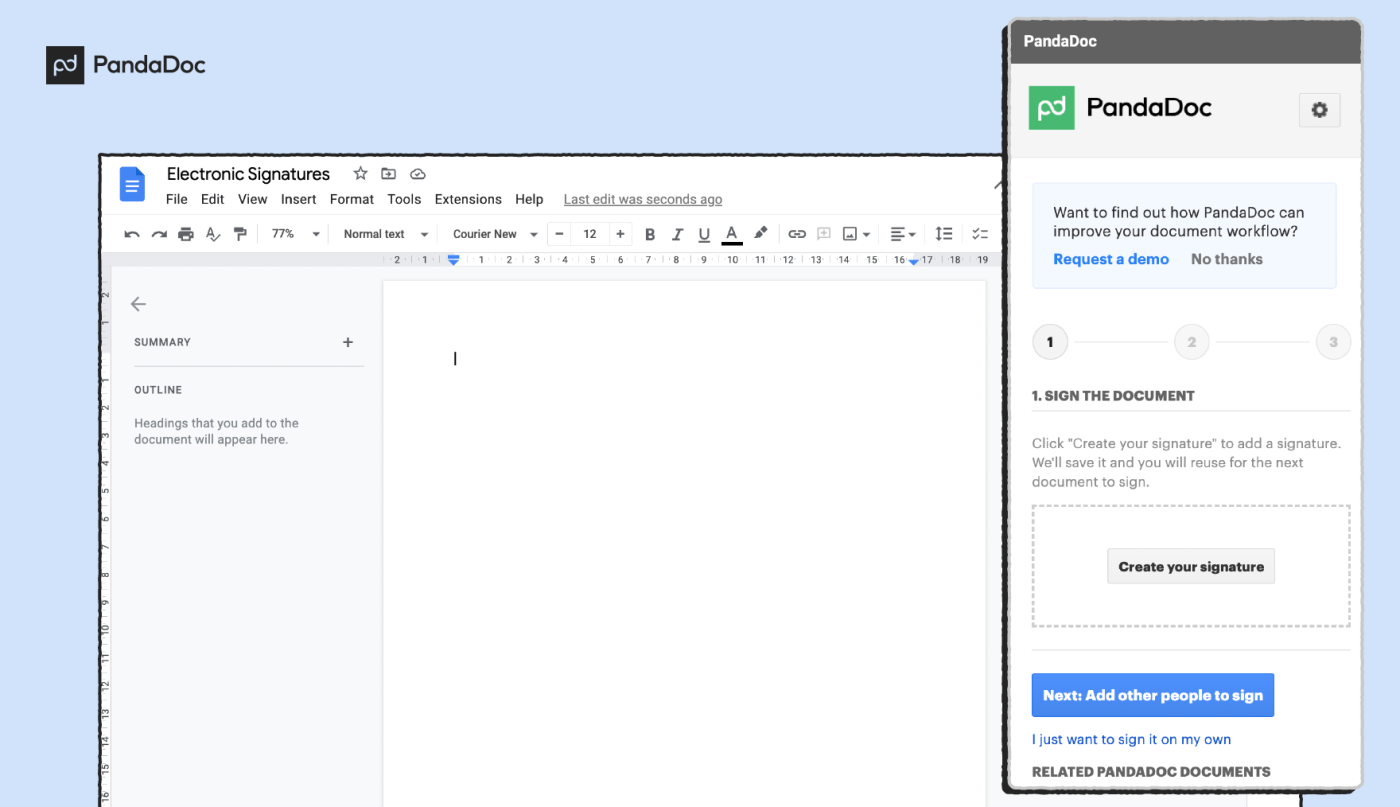
You can add multiple signers during this step. If you are the only signer, select I just want to sign it on my own to finalize the document.
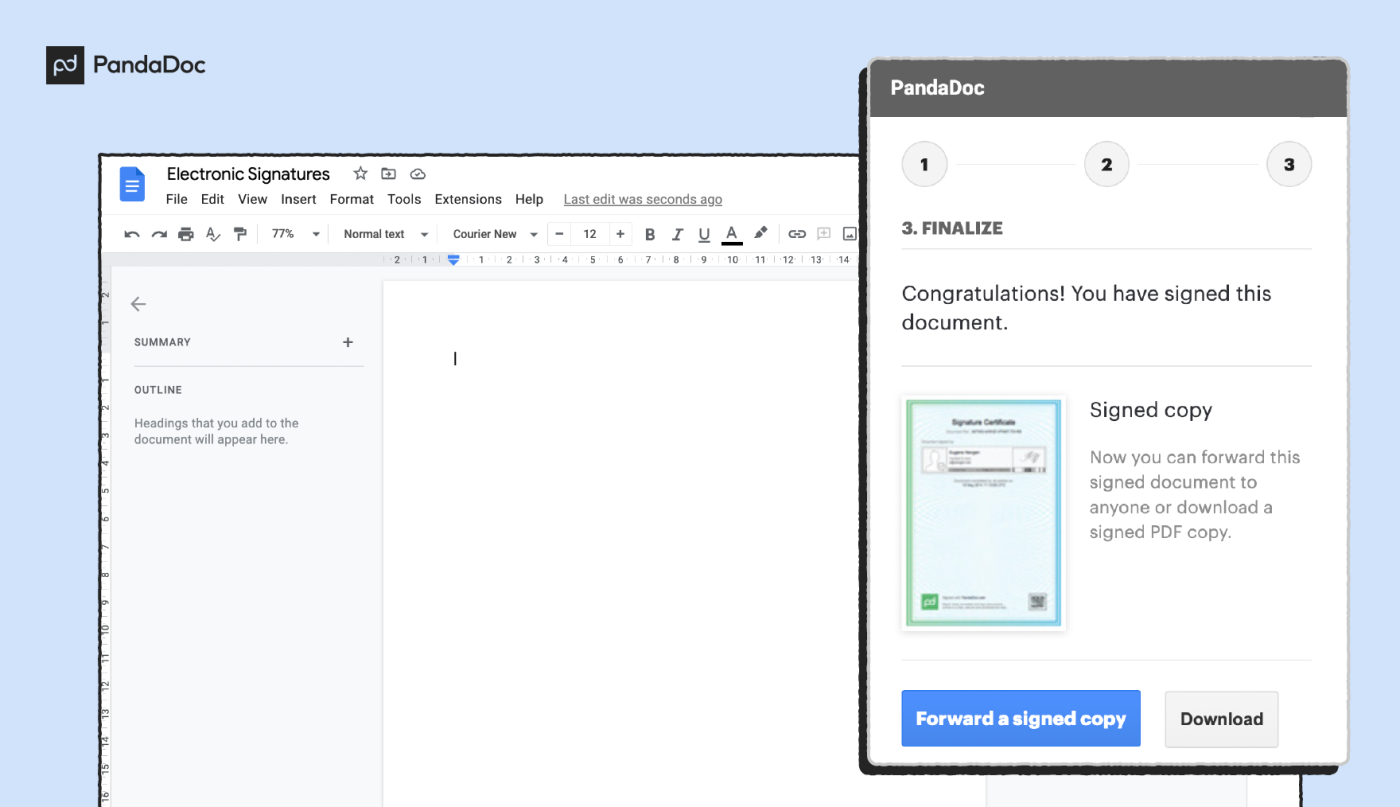
9. Once all signees have completed the document, select Finalize to complete the document.
Then, click Forward a signed copy to send the signed document to relevant recipients.
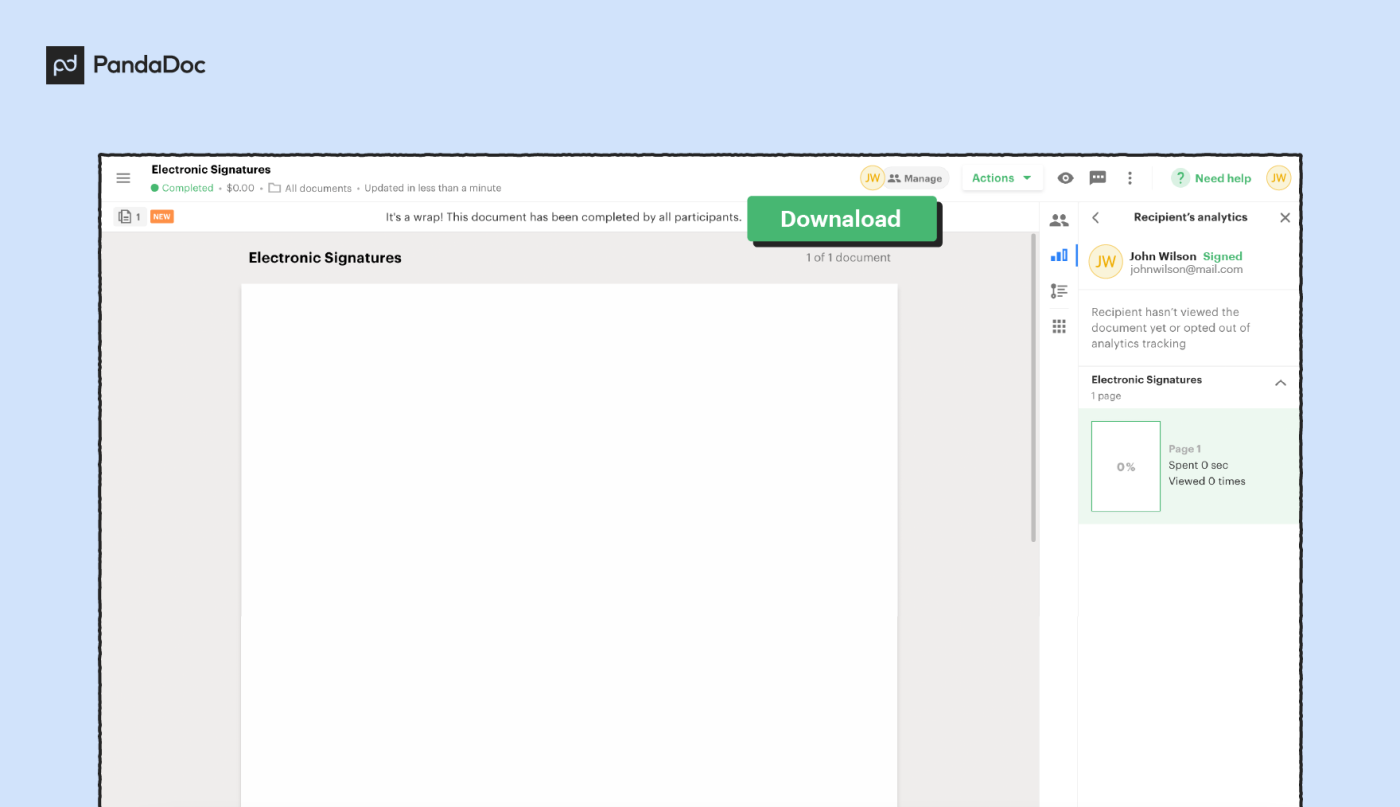
10. Download the Google Doc as a PDF document for your own records.
You might notice that the process to sign using an add-on is slightly longer than using the Drawing or the image-based method. The reason for that comes down to authentication.
This is true for all signing apps and signing add-ons. PandaDoc and other signing apps (HelloSign, DocuSign eSignature, etc.) will issue a digital signing certificate when a document is signed.
You’ll need to log in to these services using your account credentials in order to advantage of the added security.
However, once these steps are completed, your document will have the necessary signatures and secure backing it needs to stand up to legal scrutiny.
Further reading
Now you know how to electronically sign a Google Doc, but there are some other things to consider.
How electronic signatures work
Strictly speaking, electronic signatures are defined by the Federal ESIGN Act of 2000 as, “an electronic sound, symbol, or process, attached to or logically associated with a contract or other record and executed or adopted by a person with the intent to sign the record.”
This is similar to the legal definition described in the eIDAS Regulation in Europe.
With these definitions in mind, it’s important to note that e-signatures don’t have to resemble handwritten signatures at all.Anything that is determined to represent a signer could be considered a legal electronic signature.
As you might expect, because everything is created and signed in a digital format, it’s easier than ever to forge signatures.
Anyone with the right information could assume your identity and sign legal documents under your name.
That’s why most companies opt to use digital signatures, a more secure version of e-signatures, to ensure that the individual signing a contract is who they say they are.
Digital signatures
During the e-signing process, digital signatures use a specialized set of standards that help to differentiate them from simple electronic signatures. This includes encryption and evidence-based authentication.
These signatures are more than an image. To execute this strategy correctly, a company may send an invitation to a signer’s email or a text code that invites them to access a document through a device that the signer controls.
While tracking these methods of access requires extra steps, they also help companies prove that signers aren’t fraudulent.
For important legal documents, like contracts, these assurances are critical.
Which method should you use?
In most situations where you would be required to sign a document, digital signatures are the ideal choice.
With a clear audit trail and traceable line of ownership, digital signatures defend against repudiation — the ability for a signer to deny the validity of a contract by questioning the authenticity of the signature.
Of course, there are some exceptions. If you’re just trying to sign a school permission slip or a personal tax document like a 1040 Form that you were intending to print out and sign yourself, the added security may not be required.
It’s up to you to determine the level of security you need when choosing your signature style, but it’s always best to err on the side of caution when signing something that will ultimately carry legal weight.
Build better documents with PandaDoc
While PandaDoc integrations allow you to build workflows inside Google apps and other software tools that you may already be familiar with, that’s not the end of the story.
As a top-performing e-signature solution, PandaDoc is equipped with a robust document editor where you can add signature fields, and pricing tables, and gain access to more complex signing tools.
If you want to take document creation to the next level, sign up for a paid plan so that you can build proposals, contracts, invoices, and more inside the PandaDoc editor.
